Showing posts with label tim holtz. Show all posts

Thursday, January 28, 2016

It's Tag Friday @ A Vintage Journey

Hi everyone and welcome to Tag Friday (although it's still Thursday here in the US).  Whenever there is a 5th Friday in a month - that means the Creative Guides make a tag to share and it can be any theme we like.  To see all the tags from my talented team mates, click here.   I'm making my tag do double duty so I can share it on the Tim Holtz Blog for my January tag. 


Have a wonderful weekend,

Thursday, December 3, 2015

Vintage Christmas

Hi everyone and Happy Holidays.  Today is the start of a new challenge at A Vintage Journey and we are celebrating the season with Vintage Christmas.
 
In October I was lucky enough to be able to take a class with Tammy Tutterow at one of our local stores and it was a blast.  She is a wonderful teacher, sharing her tips and tricks, and a lovely person as well.  We used the Tim Holtz Folio and decorated it with so much vintage goodness.  Here is the result of the class, hope you enjoy.

 
As you can see the front is packed with lots of Tim's vintage pieces and has many layers.
 

When the folio is first opened there are two tag books that are separate pieces.

 
When the tag books are removed, there are three more layers to explore - all with places to add a photo or a special gift tag.

 
Each layer folds forward to reveal the one behind.


This was great fun to make and the class was at night so had to stay up past my bedtime but it was worth it.
 
Don't forget to pop over the A Vintage Journey to see what the rest of the team has made. 
You can do that by clicking here.
 
Have a wonderful and creative weekend,

Friday, August 28, 2015

Near or Far, Just Tweet!

Hi again my crafty friends,

I am stopping for a quick visit today to share a cute little creation using the Tim Holtz Crazy Birds
Stamps and Dies Set.  Also the Crazy Things Stamp Set which is so much fun.  I tried out a new technique, for me, on my last post which was to use stamped tissue paper.  I was happy with the face on my Steampunk girl so thought I would try it on a bigger scale. It worked beautifully.  I used the Tim Holtz "Enjoy the Journey" Stamp and Die Set for this one.

Near or far, just tweet!


After stamping the compass image on tissue paper, I embossed it with white embossing powder.  I added it using gel medium to a wood block that I had already painted blue.  Next I added more parts of the compass that had been stamped and embossed on blue paper.  I added feet to the block and a flower on top.  Below is a side view.

 
I really get a chuckle out of these birds and hope you do as well. 
Until next time-
Stay Crafty,

Thursday, April 30, 2015

Party Line

Hi Vintage Journey Fans
 
We are starting a new month and a new challenge at A Vintage Journey with our lovely hostess, Astrid, who chose the theme "Spring Colors".  Or as they spell it over there, colours.  Using the grunge factor from Tim along with his stamp set, Bird Crazy,  I had lots of fun with this one.  I've been playing with these crazy birds for weeks now and I still have some ideas going round in my head.  I'm sure they will be popping out soon.
 
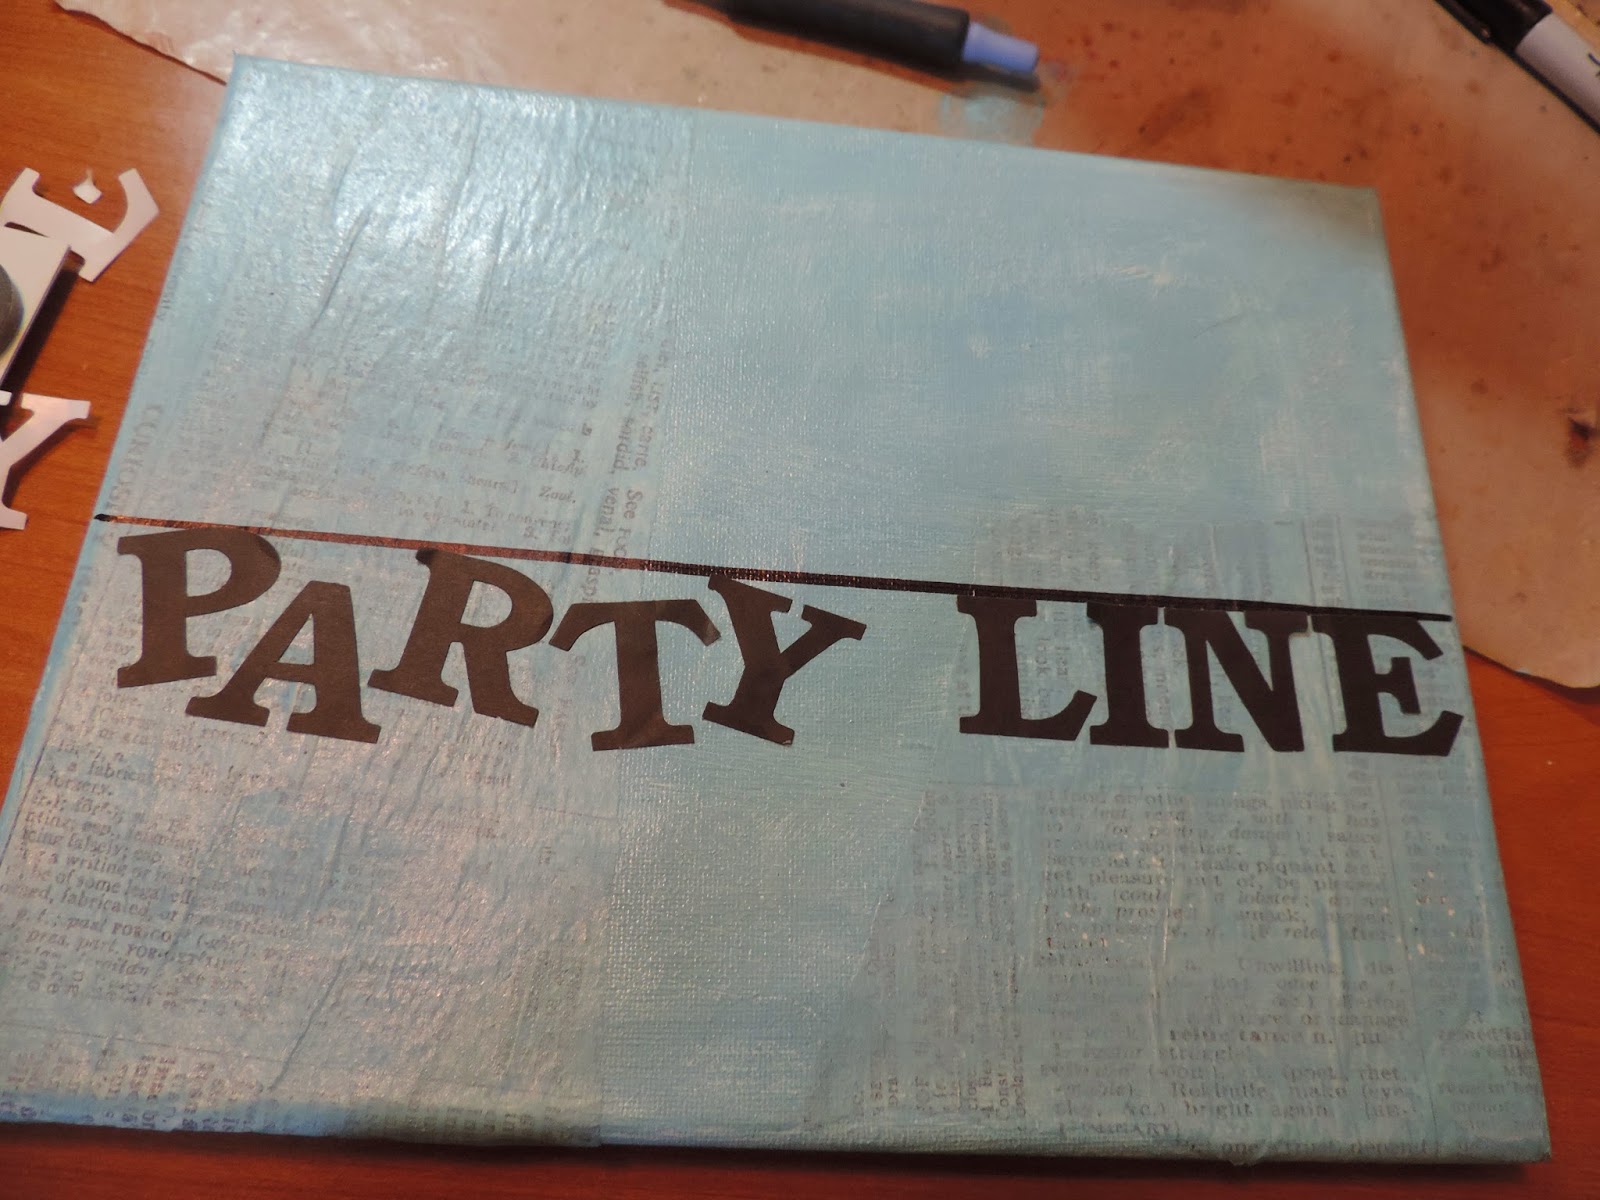
I know I'm dating myself by using this old fashion term but I just had a thought and went with it.  I hope I am not the only one who remembers the "party line" where we shared a phone line with our neighbors.  I thought I would put a different twist on the term by combining it with "party" birds on a wire. 

These birds are ready for a celebration with their noise maker, party hats and balloons.
I used the Props Die Set from Karen Burniston for the party goodies.

Here's how I did it!
 
 I started out with a canvas, added gesso and some tissue wrap from Tim's collection.
 
 Next came a layer of Distress Paint.  I used Broken China and Peeled Paint.
After dabbing it on my canvas, I rubbed it around with a baby wipe.
 
 I drew a line using a sharpie and T square, then added the lettering from some I had in my stash.  I later added  some white lines on the letters using uni-ball Signo Pen.  Last step for the lettering was to cover it with Wink of Stella.
 
I stamped my birds on manila paper and then colored them very quickly using two colors of Distress Ink on each one.  I applied the ink with dabbers and then went back with black and white to highlight some spots after cutting them out.
 
After laying out the birds the way I wanted them, I stamped them on the canvas to get the tops and legs that were previously cut off.  Then the colored bodies were glued on.
I thought they were looking a little bit like they were floating so I used a stencil and some molding paste to add the tree at the bottom of the canvas.


I hope you have enjoyed my silly take on the theme this month and you will stop by A Vintage Journey to see all the fabulous projects from the rest of the team.
 
Have a great month and don't forget to join the fun by posting your Spring Colors (colours) make with us.


Sunday, April 26, 2015

All a twitter -

Hi my friends,

I took a Twitter class recently and have been thinking about all the things I learned.  I've had some time to play and have been so enamored with the Bird Crazy Stamp Set - from Tim Holtz,  I just had to use them again.   This week the challenge over at Simon Says Stamp Monday Challenge Blog is Anything Goes so will add it over there.
All I can say is TWEET THIS!!


I  had some funky little eye glasses (a brad) in my stash so added them to the bird.  I made the "word balloon" and then added it to the bird with a small piece of acrylic to make it look as though it is floating over his head.  Some wire for his top knot and some #'s and @'s and of course the Trophy Cup.  He's ready to tweet.
 
Have a fun and creative week,

Wednesday, November 19, 2014

Thanksgiving Wishes

 
It's hard to believe that Thanksgiving is only a week away.  Where does the time go?
 
I'm just dropping in for a quick post to share a card I made today.  I used the Tim Holtz Pumpkin Jack Die for the card and cut a hole in the center.  This cute little turkey is a stamp set from Art Impressions that I colored with my Prismacolor Pencils. 


The cute sentiment is part of the stamp set. The back end of the turkey is on one of the Action Wobble things from Art Impressions so it wiggles when you open the card.  So much fun.

Have a crafty weekend-
S@ndy

Thursday, October 16, 2014

Halloween - to die for @ A Vintage Journey

 
Hi All,
 
Today I get to share a card made with one of  my favorite Graphic 45 papers, "Steampunk Spells".  
 
When our lovely host, Anne, over at A Vintage Journey told us her theme for this fortnight is - " Halloween - to die for" -  I was excited to get started.  In addition to some fussy cutting I used lots of dies for this one.  Tim's influence is clear with all the great dies I used from his collection.  


Shown below is the inside of the card with lots of real estate to write your message.


I haven't made a cascade card for awhile so thought this would be a good time to revisit this great style.  Shown below is the base of the card.  You can see a complete tutorial on the construction of this card by clicking here.


As in all projects, some changes have been made along the way, in the end, I changed the color of the front panel to a kraft color. 

I began to gather my elements using the Steampunk Girl from Steampunk Spells and the moon from the Happy Haunting Collection. 


No Halloween Card would be complete without a skeleton so used this one from Tim's collection with the stamp and die to match.


After I cut out my steampunk girl, I thought she faded into the background too much so placed her on some manila cardstock and then cut her out again.  Then added some Vintage Photo DI around the edge.


After cutting out all the elements that I wanted for my card I started adding them.  I have provided you with a complete list of the dies I used at the end of the post.
 
 
For the clock I cut the mini pocket watch, cut a gear from black and added the cobweb clock from the paper and then added an epoxy dot that had already turned yellow from sitting in my stash for so long.  I added a charm that I found of a hand. 
 
 
Well, there you have it - hope you've enjoyed my card and you will have a "Halloween - to die for".  Have a great weekend.


From Sizzix and Tim Holtz
 
Circle Framelits
Branch Tree
Mini Pocket Watch
Candlelight Fright
Mini Gears
Stamp & Die Set
Mini Bat & Skeleton Set
Weathered Clock
Heart Wings
 
From Spellbinders
 
Springly Sprockets


Wednesday, June 18, 2014

June Tag

Hi All,

Just a quick post today to get in on the challenge over at Tim's blog.  This month we used a water color technique that was fun and fast.  It is a watercolor blending background where we put the Distress Ink on the back of a stencil, spritzed it with water and then put it on watercolor paper.  You can see Tim's tag and his tutorial here.  He used the star stencil but I wanted to go my own way, as usual, and went with hearts.

 
After the background was dry, I used some stamps from Tim's collections, stamped in black and embossed with clear.  I stamped the heart twice, cut them out and put the arrow in the center of the top heart.  I colored some Crinkle Ribbon as Tim did, added it to the top and I was good to go.
 
Have a wonderful and creative day,

Saturday, April 20, 2013

Let's take a "Road Trip"

When I was at CHA this past January I saw the Tim Holtz Configurations Book and fell in love with the idea of a story contained in a box.  Here are a few pictures of my idea - hope you enjoy.


For the front cover I used a real map from an old Atlas attaching it with Glue N Seal.  You will notice lots of Tim Holtz goodies in this project because they just lend themselves to the theme.  In fact one of the stamp sets is called Road Trip.  When I stamp an image I like to use black ink and emboss with clear.  It seems to make the image stand out.  I can always find a use for gears from the Gadget Gear Die.

The book is held shut with a Swivel Clasp and a Hitch Fastener, so glad they are back on the market.  

On the other side I double stamped the tire treads using Tim's Road Trip Set from Stampers Anonymous, I like the way it looks as if a car ran over it.


The back is covered with a complete sheet from Tim's Paper Stash.

Now for the inside -  after  arranging the boxes so the Vintage Valise would fit inside I glued the boxes in and covered the edges with Tissue Tape then inked them with Vintage Photo Distress Ink.  I found some great paper at Michael's for the inside front cover but all the rest is from Tim's collections. I used many dies and findings.  Mac found a spark plug at Home Depot for me.  It is actually for a lawn mower but it fits perfectly and it even says Champion on it.  It was a great finishing touch. 


The Vintage Valise opens to reveal a pull out scrapbook.  I used Tim Holtz Paper to matt each page and then added some stamping and die cuts.  Two of my favorites are the Old Jalopy and the Vintage Camera. The suitcases are from Time Travelers, Tim Holtz/Stamper Anonymous

It is easy to flip the pages back and forth while leaving them in the box or they can be pulled out (still attached to the Valise) in a long strip as shown below.


Friday, November 23, 2012

November Tim Tag

Hey Everyone -

Well, this month I actually managed to get my tag completed.  A couple weeks ago I was the lucky winner of a challenge over at Simon Says Stamp and Show so I used my gift certificate to buy some new "Tim" stuff.  The package arrived on Wednesday and today I got to play.  One of the items I chose was the Textured Leaves Embossing Folders that go with the Tattered Leaves Die that I already had.  Here is what I did, hope you like it.

Yes, the lettering is a little backwards but that's how it fit so that's how it is!  It is art after all.

This month Tim used Versa Mark and clear embossing powder to stamp with. I decided to make my own stamps using Fun Foam and my Tattered Leaves Die.  I had sticky back Fun Foam and sticky back EZ Mount Stamp N' Stor so I put the two sticky sides together and then ran it through my Big Shot Pro and ended up with a foam stamp. 

They look different because I had to use two different colors foam but they are the same.

I next colored my tag with wild honey Distress Ink and then stamped the leaves on using Versa Mark and Ranger Clear Embossing powder & being very careful to get the stamps where they will still fit in the embossing folder.  Then heat set.


I then put the tag in the embossing folder lining up the stamped image with the image on the folder.  When I ran the folder through the machine I only covered the part of the folder that I wanted embossed.  It took me a couple tries before I got the desired results but was happy with it.


I added more color to the tag using Distress Ink, ripe persimmon and forest moss.
The finishing touches were added, I cut and embossed more leaves to go on top and inked them with ripe persimmon.  Adding some ribbon to the top and then a pin and tag that says "play" which is just what I did.  The lettering is some plastic ones from my stash.


Sunday, October 28, 2012

Charms of the Witching Hour

This has turned out to be my LUCKY week!  I was the lucky winner of not only the fabulous $50.00 gift certificate at Simon Says Stamp but also chosen as one of the top three for my entry below.  Thank you Simon Says Stamp. I have wasted no time spending my prize money.  When the UPS truck arrives I will be sharing some new projects.


With Halloween upon us I decided to get in one last project.  This is such a fun time of year and there are so many themes to go with.  Over at the Simon Says Stamp Blog the challenge theme was something using Wendy Vecchi. Wendy is having a very busy time lately as she is also featured on the eclecticPaperie Blog Hop this week. I dug around in my stash and came up with Wendy's Art Parts Pocket Watch, after a little more digging I found a great piece of Graphic 45 Paper called Charms of the Witching Hour.  Since I love anything clock related I think you can guess where this is going.  It was great fun.


It is a real battery operated clock.  I started out with the Wendy Vecchi Pocket Watch using both the solid one on the back and the die cut to layer on the front.  I used copper embossing powder on the front.   After cutting out the paper and clock I layered them on the front.  Next I drilled a hole in the center for the clock works. 

The large pumpkin on the side is not attached but thought it looked cute for the photo. It is made with 6 Rosettes, a Tim Holtz Die. I made the 6 rosettes (2 of each size) and stacked them with the 2 largest ones in the center and used the graduating sizes on top and bottom.  The pumpkin, leaves, fence, clock, tree, witch and bat are all Tim Holtz dies.

In order to make the clock stand up I made a stand out of black chipboard.  The platform is a Stampin Up Die - Top Note. 

Here are some photos of the back so you can see the construction.


Sunday, May 20, 2012

Can You Hear Me Now?


Here are a few cards made with some new dies that arrived this week.  "Can you hear me now?" is made with the Vintage Telephone Die from Tim Holtz  and Sizzix.  These new ones are so much fun and I have been making lots of easle cards lately.

FRIENDSHIP CARD-


Here I used the Vintage Globe Die from Tim Holtz and Sizzix.  I cut the globe section 3 times seperating out the green and edging it before adding the final layer.


"You're Just My Type" made with the Vintage Typewriter from Tim Holtz & Sizzix


"#1 Fan" Who wouldn't want to get this card - a fun way to say Thank You!

"Fun Times!"  add your own photo to the Tick Tock Die.
I Have several more new dies to play with so got to run.  HOPE YOU LIKED THEM.