Showing posts with label Distress Paint. Show all posts

Thursday, December 3, 2015

Vintage Christmas

Hi everyone and Happy Holidays.  Today is the start of a new challenge at A Vintage Journey and we are celebrating the season with Vintage Christmas.
 
In October I was lucky enough to be able to take a class with Tammy Tutterow at one of our local stores and it was a blast.  She is a wonderful teacher, sharing her tips and tricks, and a lovely person as well.  We used the Tim Holtz Folio and decorated it with so much vintage goodness.  Here is the result of the class, hope you enjoy.

 
As you can see the front is packed with lots of Tim's vintage pieces and has many layers.
 

When the folio is first opened there are two tag books that are separate pieces.

 
When the tag books are removed, there are three more layers to explore - all with places to add a photo or a special gift tag.

 
Each layer folds forward to reveal the one behind.


This was great fun to make and the class was at night so had to stay up past my bedtime but it was worth it.
 
Don't forget to pop over the A Vintage Journey to see what the rest of the team has made. 
You can do that by clicking here.
 
Have a wonderful and creative weekend,

Monday, November 16, 2015

It's Designer Challange Week

Yay !! - it's Designer Challenge week at Elizabeth Craft Designs with Karen Burniston.  This month she has challenged the team to use any technique from her many YouTube Videos.  It was hard to decide but I finally settled on The Grungy Gears Background Technique.  You all know how much I love gears and grungy stuff so this was for me.  Karen's videos are designed to inspire you to make something similar using the technique - but if you choose to make it exactly, that's fine too.  Here's my card for the challenge using the Clocks & Gears Set, the Spiral Pull Card, the Rectangle Pull Card and Lucky. 
 I have linked all dies below so you can find them easily.
 

I'm a fan of using what is at hand and making the best of it.  I didn't have the shelf liner that Karen used in her video so I used Aluminum Foil from the kitchen and it worked just fine.  I was also out of Black Soot Distress Paint so I used Barn Door instead and I rather like how it turned out.  In addition to the gears I used some of the numbers and clock hands and added a few of the negative circles as well.  I didn't need to alter Lucky, he's too cute just as he is.


On the inside of my card I simply wanted to add the pop up from the Rectangle Pull Card to the Spiral Pull Card and say "hello".  I cut the word "hello" and the clock face on the front from manila paper and then painted it with the same Distress Paint. 

 
Here's a little close up so you can see the gears and clock parts.
 
Hope to see you tomorrow- I'll be back with my second card for the challenge,


Thursday, November 5, 2015

Baby - You're A Firework

Hi and welcome to a new month and that means a new challenge at A Vintage Journey.  This time our lovely hostess, Nikki, choose the theme:  Baby, You're a Firework.  It is a tradition in some countries to have a huge firework display on many different holidays.  I would like that in the US as it seems like a simply marvelous idea.  Here is what Nikki challenged us to do: Fireworks are a big part of celebrations at this time of the year. Be inspired by them to create a Tim style project; think Distress Glitter, bold colours, ink and paint splats and fun. Go on, light up that night sky.
I decided to work in my journal again this time.  It is becoming quite thick, that makes me happy because it means I have finally ended my procrastination.  Here is how I interrupted the challenge.


I wasn't really sure where I was going when I started but ended up in a good place.   I used Tim's On The Edge Die "Townscapes" for the buildings and then colored in the windows and doors.  The fireworks are cut from glittery Fun Foam that I found at the dollar store, I used the splat from the Scribbles Die Set for that.  The white stars are molding paste using a layering stencil.  It is finished off with Holiday Words.

 
 I started out with four pages that I had already applied gesso to.  The top two pages are torn around the edges on all sides.  Some scrapbook paper was added to the bottom two pages. Then a layer of Tissue Tape was added.  Two shades of acrylic paint on the top pages, light and dark blue.  The top pages were then glued to the bottom ones.  I splattered on some watered down gesso to the top portion. 

 
The finishing touches were red edging and lots of Stickles!!
 
Don't forget to stop on over to A Vintage Journey to see what the rest of the team made - I can guarantee you will be delighted. 
 
Have creative weekend,

Thursday, October 1, 2015

Art Journaling with Tim

 
Hi and welcome -

Before I get started on today's challenge I just want to let you know that we are looking for a couple of new Creative Guides at A Vintage Journey.  If you like vintage and love sharing what you create this is the place for you.

For anyone who may be interested we are looking for
  two new Creative Guides 
to join our talented team. If you would like more information and details please email Brenda at brenda_brown25@hotmail.com by Monday 5th October.

Today is a new challenge at A Vintage Journey hosted by the lovely Alison of  Words and Pictures.  I was delighted when I saw her challenge, Art Journaling with Tim, because I seem to procrastinate when it comes to journaling.  I did a two page spread and really packed it full of Tim's products and techniques.
 
I  had no idea where I was going with this but as I started, it just seemed to flow into a fun page.
Hope you enjoy----


Here's How I Did It-


I already had some pages with gesso on them so used those.  I had torn one page but
took off a little more. 
 

Using some of Tim's Tissue Wrap, I covered the full page on the left and went up to the torn edge on the right.  I secured the tissue down with gel medium.  When it had dried, I rubbed on more gesso with a damp baby wipe.  I wanted to push the paper to the background without covering it completely.   

 
 Next came some Distress Paint, Broken China and Peeled Paint.  I cut the butterflies from another tissue wrap and put them on with gel medium.  I curled the edges of the torn page to fit around the butterflies, then added some Walnut Stain Distress Ink.  I have tons of washi tape but never seem to use it - so decided this would be a good time.  After adding rows of the colorful tape I glued the torn page to the page below, actually using 3 pages of  the journal.  I like how blue and orange work together so used those colors and then used some Rusty Hinge Distress Ink on the top. Some tape and ink were also added on the lower left corner.  A piece from the Mixed Media Die Set was added to the top right.

 
Next came the molding paste using some of Tim's Layering Stencils, Wildflower, for the flowers at the bottom and, Bubble, for the dots around the sides. They seemed to be so bright white so I rubbed some Cornflower Blue Archival Ink on, very lightly, with my fingers.  The large letters are Grunge Board colored black.  The smaller letters were stamped on.  For the finishing touches, a Pen Nib, a Keyhole and Leaves along with wire were added.  Some random stamping with a script stamp and then edged with Archival. 


The final step was to add some color to the butterflies.  I used Chameleon Pens for that.
 If you haven't tried Art Journaling yet, procrastinate no longer. It's fun and easy.

Hope you have an "Artful" weekend,
S@ndy


Thursday, September 3, 2015

Home Sweet Home for A Vintage Journey

Hi everyone and welcome,

We are home from our big Canadian Adventure.  We traveled many miles, 11,000 in all, and saw some pretty spectacular things.  I love to travel and see the world but as they say  "there's no place like home".  Jennie's challenge "Home Sweet Home" couldn't have fit my mood any better so I made a quick little entry in my art journal to mark the occasion.  Hope you like it.


I already had gesso on the pages so got right to work.  This project went together rather fast because I had the house cut out and stashed away.  It is from a DCWV paper pad.  I cut out the flower and word "beautiful" from the same paper pad.  All of the letters are grunge board from some packs that I purchase awhile ago. 

 
I started out painting my pages using Distress Paint, Salty Ocean and Picked Raspberry, but found that the color was just a little intense so I went over all of it with Picket Fence.  Alone the way I had a happy accident when I forgot to wash my brush before adding the second color.  With the blue already on the brush the pink turned a bit purple, which was ok with me.
 
I painted all the letters with Picked Raspberry and then grunged them up a bit with some Vintage Photo.  The button was in my button jar and it was the perfect size and color so all I had to do was remove the shaft and glue it on.  Using molding paste I added a nice white cloud and some edging with one of Tim's Layering Stencils. Since I used Distress Paint and it was dry, I chose to edge the entire thing with Archival Ink, Cornflower Blue.
 
Please pop over to A Vintage Journey to get more inspiration from the lovely Creative Guides.
They never disappoint!
 
Have a crafty weekend,


Thursday, May 28, 2015

Tag Friday @ A Vintage Journey

Hi and welcome - it's Tag Friday over at A Vintage Journey so I hope you will stop by for a visit.  The Creative guides have offered up some awesome inspiration for you.   There is no theme so you are in for a real treat and great variety.
 
As for me, I did some stash diving and found a tag that already had a background so used it.  All I needed to do was add some finishing touches and here is the result.


Last year I did a Destination Inspiration post for VJ where I shared different ways to use Tim's marbling technique so I already had some backgrounds made and this is one of them.

 
 I made my shaker window using Tim's Mover & Shaper birdcage.  I won't bore you with the details of how to make a shaker window as there are many tutorials on YouTube to show you how to do this.
 

So far, so good - next I added the embellishments and the bird but was not too happy as it looked flat and boring.
 

 I decided to fix that by ruffing up the edges of the inside tag and adding a little detail to the flowers and bird using my markers.  I then added the ribbon and a key along with a word tile that says "Free".  Now I like it better.  I used some Vintage Photo Ink on the edges and the flowers, much better.
 

 Hope you have enjoyed and will hop over to A Vintage Journey to see what everyone else made.
 
Have a crafty weekend,


Thursday, April 30, 2015

Party Line

Hi Vintage Journey Fans
 
We are starting a new month and a new challenge at A Vintage Journey with our lovely hostess, Astrid, who chose the theme "Spring Colors".  Or as they spell it over there, colours.  Using the grunge factor from Tim along with his stamp set, Bird Crazy,  I had lots of fun with this one.  I've been playing with these crazy birds for weeks now and I still have some ideas going round in my head.  I'm sure they will be popping out soon.
 
I know I'm dating myself by using this old fashion term but I just had a thought and went with it.  I hope I am not the only one who remembers the "party line" where we shared a phone line with our neighbors.  I thought I would put a different twist on the term by combining it with "party" birds on a wire. 

These birds are ready for a celebration with their noise maker, party hats and balloons.
I used the Props Die Set from Karen Burniston for the party goodies.

Here's how I did it!
 
 I started out with a canvas, added gesso and some tissue wrap from Tim's collection.
 
 Next came a layer of Distress Paint.  I used Broken China and Peeled Paint.
After dabbing it on my canvas, I rubbed it around with a baby wipe.
 
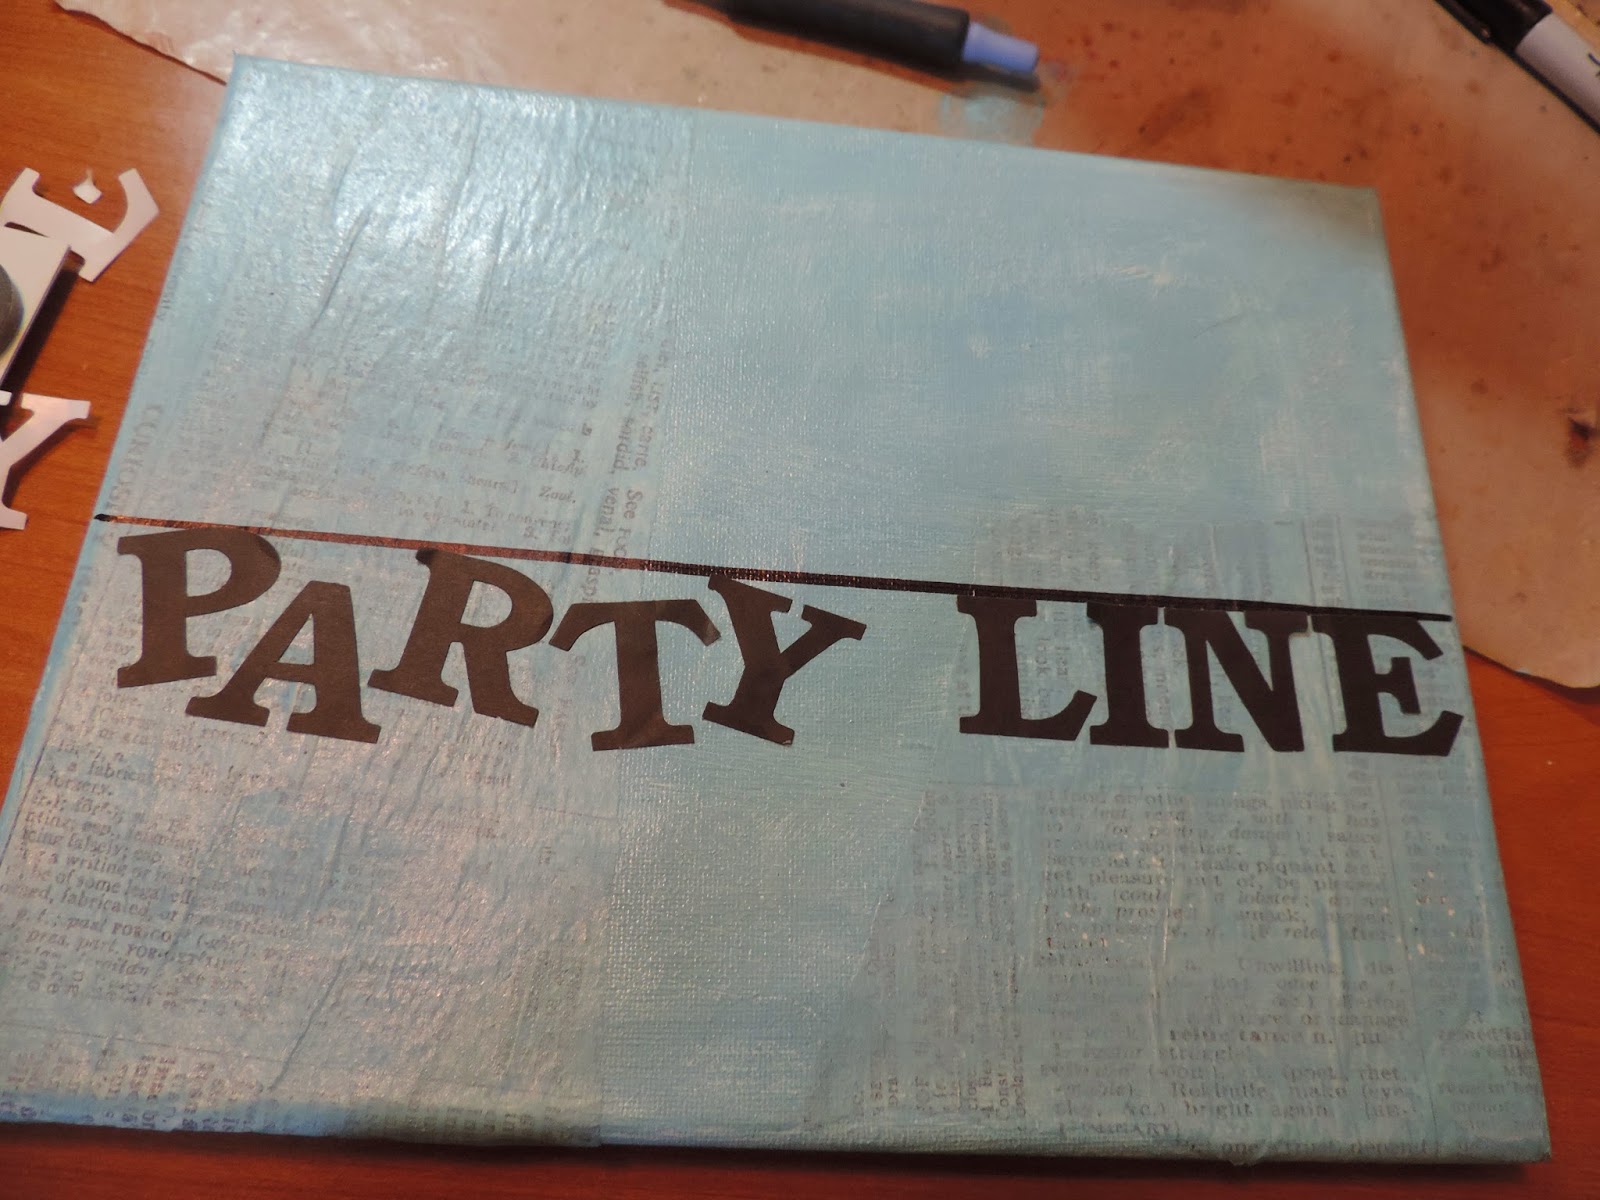
 I drew a line using a sharpie and T square, then added the lettering from some I had in my stash.  I later added  some white lines on the letters using uni-ball Signo Pen.  Last step for the lettering was to cover it with Wink of Stella.
 
I stamped my birds on manila paper and then colored them very quickly using two colors of Distress Ink on each one.  I applied the ink with dabbers and then went back with black and white to highlight some spots after cutting them out.
 
After laying out the birds the way I wanted them, I stamped them on the canvas to get the tops and legs that were previously cut off.  Then the colored bodies were glued on.
I thought they were looking a little bit like they were floating so I used a stencil and some molding paste to add the tree at the bottom of the canvas.


I hope you have enjoyed my silly take on the theme this month and you will stop by A Vintage Journey to see all the fabulous projects from the rest of the team.
 
Have a great month and don't forget to join the fun by posting your Spring Colors (colours) make with us.