Showing posts with label idea-ology. Show all posts

Thursday, February 28, 2019

Celebrate the Journey


Hi my friends,

Today is the birthday of  the Vintage Journey Challenge Blog and the theme was chosen by our lovely hostess, Brenda Brown, she is asking us to Celebrate the Journey that we have been traveling on.  Over the years we have celebrated many themes and artists and we love seeing what our members create.   Today I am celebrating my personal journey into the world of video.  I have made a few videos and created my YouTube Channel, so far I'm ok with them but see that I have much to learn.  I'm making it my artistic journey this year to make more videos and hopefully reach more viewers.

My card for this challenge depicts the idea of breaking free from our fears and the things that make us doubt ourselves.


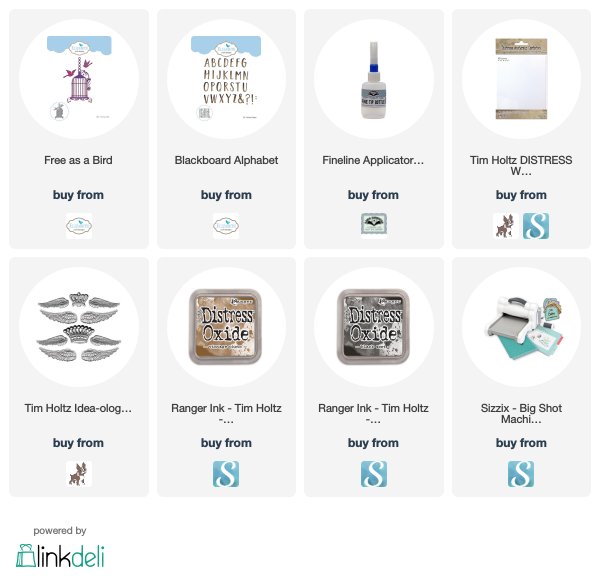
I've used some great dies from Elizabeth Craft Designs and a phrase that I found in my stash that sums up the theme beautifully.  The wings, woodgrain paper and flower  I'm sure you will recognize from the Tim Holtz collection at Idea-ology.

Don't forget to fly,
S@ndy

 Compensated affiliate links are used where possible with no extra cost to you. This way I can continue to share all the projects I include on my blog.  I only use and share products I love.
Thursday, March 23, 2017

Happy Easter

Happy Easter -  I hope you will stop by the Elizabeth Craft Designs Blog today to see how I made this fun project.  It is a challenge issued from me, to me.  Make an Easter Bunny without using a bunny die.  A complete tutorial including all dies used can be found by clicking here.


See you there,

Sunday, March 19, 2017

Happy Sunday

Hi friends,

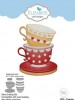
Just a quick stop today to share a tag I made awhile back.  A friend was here the other day and we were talking about tea cups.  It made me think about this tag. Enjoy and have a great day.


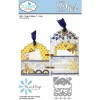
I've linked my supplies below and, as you will see, I used lots of great dies from the latest release at Elizabeth Craft Designs featuring Joset Designs.

See you Thursday for a tutorial on the Elizabeth Craft Designs Blog,
S@ndy
 

Thursday, March 9, 2017

A Play Day for Me

Hi friends, 

Just a quick stop today - I have been playing in the studio and decided to join in a few challenges that are currently going.
 
For the Simon Says Stamp Challenge they want us to make our own background.
For Creative Carte Blanche, Its All About The Numbers.
For Emerald Creek Dares says -Splatter Some Fun
And Mixed Media Monthly says - Buttons
 
 I did a big chipboard tag with several tags added for a colorful and playful creation.


This was fun for me because I could just do as I pleased and that is just what I did.  For the main focal point I used a printed canvas from Dylusions.  I used the colors in the canvas as my start.  I must confess I did some stash diving and came up with some tags that were just laying around. After adjusting the colors a bit - they were perfect. 
 
 
I found this tag that was rather too orange for me and sprayed it with Memories Mist, Iced Coffee.
 
 
The background was made by putting some embossing paste through a Tim Holtz Layering Stencil.
When that was dry, paint was added.  It is hard to explain this process as we all go at it in a different way but I used several colors.  Some of the paint was wiped away before it dried to reveal the stenciled numbers.
 
 
After much playing and decision making on which embellishments to use - everything was glued in place.  In order to add the splatters, the main image was covered and then the splattering began.
 
 
I used some Media paints, some Tim Holtz Grunge Board elements and the end of a ticket from my idea-ology stash, some of Tim's Remnant Rubs and a star button.
 
Thanks for stopping by -
Enjoy your day,

Thursday, October 6, 2016

Make it Spooky

It's time for a new challenge at A Vintage Journey and this time Anne, our lovely hostess, has asked us to "Make it Spooky".  I have been loving the Alcohol Ink on Yupo Paper technique and have made my tag using that technique.  


This was lots of fun to make using Alcohol Ink to create the different colors for the background and then dropping yellow Alcohol Ink on top to create the moon.  I placed the Bat stencil from Karen Burniston on top and then removed some of the color using blending solution.  I wanted the haunted house from the Mini Halloween set by Tim Holtz to stand out so first I removed most of the background color by stamping and wiping off the Archival Ink while still wet.  I then went back in and stamped it again with black Archival.  I used my Misti tool for that process.  I die cut one tree from the All Seasons Tree set and placed it in the front.  To finish it off I used one of Tim's skeleton charms along with ribbon and twine.

Hope your October is Spooky,
S@ndy

Thursday, October 1, 2015

Art Journaling with Tim

 
Hi and welcome -

Before I get started on today's challenge I just want to let you know that we are looking for a couple of new Creative Guides at A Vintage Journey.  If you like vintage and love sharing what you create this is the place for you.

For anyone who may be interested we are looking for
  two new Creative Guides 
to join our talented team. If you would like more information and details please email Brenda at brenda_brown25@hotmail.com by Monday 5th October.

Today is a new challenge at A Vintage Journey hosted by the lovely Alison of  Words and Pictures.  I was delighted when I saw her challenge, Art Journaling with Tim, because I seem to procrastinate when it comes to journaling.  I did a two page spread and really packed it full of Tim's products and techniques.
 
I  had no idea where I was going with this but as I started, it just seemed to flow into a fun page.
Hope you enjoy----


Here's How I Did It-


I already had some pages with gesso on them so used those.  I had torn one page but
took off a little more. 
 

Using some of Tim's Tissue Wrap, I covered the full page on the left and went up to the torn edge on the right.  I secured the tissue down with gel medium.  When it had dried, I rubbed on more gesso with a damp baby wipe.  I wanted to push the paper to the background without covering it completely.   

 
 Next came some Distress Paint, Broken China and Peeled Paint.  I cut the butterflies from another tissue wrap and put them on with gel medium.  I curled the edges of the torn page to fit around the butterflies, then added some Walnut Stain Distress Ink.  I have tons of washi tape but never seem to use it - so decided this would be a good time.  After adding rows of the colorful tape I glued the torn page to the page below, actually using 3 pages of  the journal.  I like how blue and orange work together so used those colors and then used some Rusty Hinge Distress Ink on the top. Some tape and ink were also added on the lower left corner.  A piece from the Mixed Media Die Set was added to the top right.

 
Next came the molding paste using some of Tim's Layering Stencils, Wildflower, for the flowers at the bottom and, Bubble, for the dots around the sides. They seemed to be so bright white so I rubbed some Cornflower Blue Archival Ink on, very lightly, with my fingers.  The large letters are Grunge Board colored black.  The smaller letters were stamped on.  For the finishing touches, a Pen Nib, a Keyhole and Leaves along with wire were added.  Some random stamping with a script stamp and then edged with Archival. 


The final step was to add some color to the butterflies.  I used Chameleon Pens for that.
 If you haven't tried Art Journaling yet, procrastinate no longer. It's fun and easy.

Hope you have an "Artful" weekend,
S@ndy


Wednesday, August 26, 2015

Steampunk Wingz

Hi my crafty friends,

I am finally back from my fabulous trip through the Canadian Atlantic Maritimes.  We had a wonderful trip with no major problems but it is so nice to be back home.  I have missed my crafting and my studio.  While I was away I made lots of notes for things I want to make when I got home so I will be sharing those in the next few weeks.

While I was away my friends went to Art Unraveled, an art extravaganza in Phoenix each August.  I am usually gone in August so didn't get to go, I still can't believe they would go without me.  Anyway, my friend Cheri picked up a lovely gift for me and I couldn't wait to start working on it.  I finished it last night so thought I would share.

This laser cut chipboard kit from Grapevine Designs and Studio started out like this:


With a little work and very messy fingers it turned out like this:
What fun, thank you Cheri!!


Her wings and base are covered with dry embossed clocks and gears, on foil tape, from the Tim Holtz line of Texture Fades from Sizzix.  They were then colored using Alcohol Inks from Ranger.  For her face I used a domino stamp, sorry - don't know the brand, stamped on tissue paper and then added using Gel Medium.
 
I perched her on an old tin that I had in my stash and then added the
idea-ology Letterpress word Wingz.  I embossed each letter with a different color of embossing powder.  The photo below shows the letters close up.

 
I had so much fun with this and since I see that the current challenge over at
Mixed Media Monthly is  "Get Texty" she will be flying over there as my entry.

 
Enjoy the rest of the week,