Showing posts with label Karen Burniston Pop It Ups Dies. Show all posts

Saturday, October 14, 2017

Saturday School week 17

Hi Students,

Don't you love it when you get to use something from your stash that hasn't seen the light of day for awhile?  I always loved the Karen Burniston Characters and this week I got to use Hoppy the Frog for todays lesson.  F, or in this case fr, is for Frog.


Enjoy your weekend,
S@ndy

Wednesday, June 7, 2017

Pop it Ups Wednesday


Hope you will stop by the Elizabeth Craft Designs Blog today to see how I created this fun birthday card for my Dad.  Simply click here.
 
 
See you there,


Thursday, June 1, 2017

New Challenge at A Vintage Journey - Canvas

Hi fellow travelers, 

Today is the start of a new challenge at A Vintage Journey and our lovely hostess, Nikki, has asked us to use canvas.  I chose to use a small canvas from my stash that I got at a flea market, it already had something on it but not something I wanted.  I simply put a coat of gesso over the old and started the new.

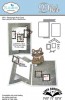
My canvas is the celebration of Summer.  A time when the kids are out of school for awhile and things are a little easier.


 We have a wonderful sponsor and giveaway this month.


We would love for you to join us for this fun challenge.  Just click here and then follow the Inlinz prompt to submit your entry.  Good Luck! 
 
The randomly chosen lucky winner will receive a $25 voucher to spend in their store.

Here are a few steps that I took to create my canvas.
 

Starting out with a Gelli Plate, spread green and blue paint.  Next lay a stencil on the paint, the pattern really doesn't matter as it is only used to give some random texture.
Place your canvas face down on the painted surface and press down so the paint transfers to the canvas.

 
Let paint dry, mix up some texture paste with color of choice.  For this canvas I wanted sunshine so I used Distress Oxide Fossilized Amber reinker to color my paste.  Next spread the colored pasted through a stencil.  I used a Tim Holtz stencil here to create my sunshine.
 

While you are waiting for paste to dry, begin getting all the other elements ready to add.  This cute little bicycle is from ClearScraps. I added a couple gears from Tim Holtz and then a coat of gesso.    Truthfully,  I did a few colors before I came up with what I wanted.  You can change colors as many times as you like by simply adding another coat of gesso and starting again.  In the end I got the effect I wanted by stippling the colors on.
 
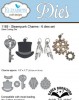
For the finishing touches - some small flowers and balloons were added using some dies from Karen Burnistion's Pop it Ups collection from Elizabeth Craft Designs.  The balloons are added using wire and then wrapped through the basket on the bike.  The word "Summer" was cut from fun foam using an Elizabeth Craft Designs die from the A Way With Words collection.

 
Please hop on over to A Vintage Journey to see what the team made for this great challenge,
 it will be worth the trip,
S@ndy

Saturday, April 22, 2017

Perrr-fect Weekend

Hi my friends,

Just dropping by to say - hope you have the perrr-fect weekend.  Here in Arizona we are having warm sunny days and all the cactus and trees are in bloom.  I made this totally Pinterest inspired card using some fun new and older dies from Elizabeth Craft Designs


Enjoy,


Tuesday, April 11, 2017

Paper Pros Challenge

It's time once again for the Paper Pros monthly challenge and the thing I love about this is that there are no rules, no theme and no pressure.  Today I made a card using some Karen Burninston Pop it Ups dies a tag topper from Elizabeth Craft Designs and lots of Tim Holtz Remnant Rubs along with the Oxide Inks that everyone is so in love with.
 
 
I had some fun while making this card because I was never sure where it was going to end up but I like the results.
 

Starting with a folded standard card 4.25" x  5.5".


Next came the fun of using the new Ranger Oxide Distress Inks.  I put a few colors on a non stick craft mat, spritzed with water and then dragged the card through it. 
 
When I was happy with my color, I placed the Tag Pivot die on the center aligning the nibs of the die with the center fold.  After running it through my die cutting machine I folded the pivot toward the center of the card.
 
 
I used parts and pieces of several Remnant Rubs as desired.  The hot air balloon is one of Karen Burniston's - Hot Air Balloon Pop Up Card.
 
Have a great week,

Wednesday, April 5, 2017

Pop it Up Wednesday

Hi friends,
 
Today I'm sharing fun Easter Card on the Elizabeth Craft Designs Blog.  Lucky the Rabbit is happy to find a colorful Easter Basket.  You can see all the details by clicking here.


See you there,

Thursday, March 23, 2017

Happy Easter

Happy Easter -  I hope you will stop by the Elizabeth Craft Designs Blog today to see how I made this fun project.  It is a challenge issued from me, to me.  Make an Easter Bunny without using a bunny die.  A complete tutorial including all dies used can be found by clicking here.


See you there,

Tuesday, March 14, 2017

March Paper Pros Challenge

 
Hi friends, it's the second Tuesday of the month and that means the Paper Pros are having a  casual challenge featuring Pop it Ups.  These fun dies are designed by Karen Burniston for Elizabeth Craft Designs. 
Our challenge this month is  Pi (Greek letter “Ï€”)
 The symbol used in mathematics to represent a constant — the ratio of the circumference of a circle to its diameter.
For the challenge this week we were asked to create cards that feature circles and/or pies!
  
Today I have a birthday card to share and I hope "ewe" enjoy it. 


Start with a herd of sheep using the Snowball Character Die.
 

Because I wanted to use 3 sheep I made my card 5" X 7", shown in the striped paper.  Mat the front panel with one black and one coordinating paper.  Cut the 3 holes using a circle die.

 
The rings around the holes can be easily made by combining 2 different sized circles.  Cut the 3 rings and add to card, using the Happy Birthday Pop it Ups, cut the words.
 
 
For the inside, use the Lucy Label Pop Up to hold the remaining 2 sheep.  Add a little grass and lettering and "Bingo"  You have a fun card to celebrate a birthday.
 
To see lots more great ideas and techniques for Pop it Ups, click here.
 
Have a wonderful week,


Tuesday, March 7, 2017

It's In The Box

Hi my friends and welcome to another Elizabeth Craft Designs Challenge.  This month we were challenged with the title, It's In The Box.  We are to make something with one of the wonderful box dies from the new release.  I used the Lantern Box for my project and went with "Party Lights".  If you stay tuned until the end, I will be showing you several more ways  to use this great die.  
 

For our challenge today we are giving away “a box die of choice”  to 3 winners. The winners will get to select which box die they would like to receive from the following dies: Star Pillow Box, Triangle Treat Box, Lantern Box, Bonbon Box or Pillow Box with Handle.
To enter simply leave a comment on this blog post below and answer this question: “Which is your favorite box from the January 2017 collection?”
We will select 3 lucky winners in a random drawing.
The winners will be announced on Friday, March 10 on the Elizabeth Craft Designs blog

Here's how to make a party light.


Begin with the Lantern Box die and cut 2 pieces.
Poke all the decorator pieces toward the back as shown in fig. 1.
Gently pull off excess pieces, then turn to right side to reveal design as shown in fig. 2.


Find and fold all crease lines. the die will make the lines for you.


Add Clear Double Sided Adhesive to tabs and join together.


Fold bottom panels up to form box.  Add glue or tape to hold in place.


Add battery operated tea light and close top.  Add embellishments.

Some other thoughts using the same die -


This one is decorated for Valentine's Day but any holiday would make a cute gift box.
The sweet little red heart came for the Oval Pull Card.


Masculine cards and gifts are always a challenge but here I've added some gears from the Clocks & Gears die and the Steampunk Charms die along with some great paper from Through the Lens.  My team mate, Sanna, has shared some other great masculine boxes on the challenge post here.


How about this idea for a place holder at your next dinner party?


A great way to give a small gift for anyone having a birthday.

Have a creative week,
S@ndy

Wednesday, March 1, 2017

Pop it Ups Wednesday

Hi my friends, today it is my turn to share a card on the Elizabeth Craft Designs Blog.  I have a Pop it Ups card using the Hanging Charm Pull Tab die designed by Karen Burniston. 
 
I used the Steampunk Debutante Paper Collection from Graphic 45 which I have been hoarding for awhile.   
 
To see a complete tutorial on how I made this card simply click here.


Enjoy your day,

Sunday, February 26, 2017

Pop it Ups Card using Steampunk Debutante Paper Collection


Hi friends and welcome back.  Today I'm here to share a card I made for our friends anniversary.  I have decided to break out my stash of Steampunk Debutante Paper from Graphic 45 - which I have been hording for awhile.  I made two cards, one I'm sharing today using the Rectangle Pull Card, the second one will be on the Elizabeth Craft Designs Blog on Wednesday where I'm sharing a tutorial for a Pop it Ups card using the Hanging Charm Pull Tab designed by Karen Burniston


On the front of my card I used an image from the Steampunk Debutante paper collection along with some gears (or cogs) from the Steampunk Charms die and the Clocks and Gears die all designed by Karen Burniston for Elizabeth Craft Designs, the Happy Anniversary is from Elizabeth Craft Designs.

 
The Rectangle Pull Card comes with this nifty piece for the inside of the card that makes what ever is added to it pop up.  I added 2 top hats from the Steampunk Charms die set.


The hats were added with a piece of clear acrylic packaging so it appears that they are flying.
Print sentiment on computer and add to card.


These cards are fun and easy, simply line the center nubs of the die on the fold of the card.  The card can be any size you like.  This one is 6" X 6".

 
Add the tab on the center fold.

 
Add hats and finish decorating as desired.
 
Have a creative week and hope to see you on Wednesday,

Tuesday, February 14, 2017

Bear Hugs

Hi everyone and welcome to the first challenge of the Karen Burniston Designers Challenge team alumni, now called Paper Pros.  We have all been talking and decided  we really needed and missed the challenges so here we go for our first of what I hope will be many.  This time around we are challenged with the theme "Shake It Up".  We could either make a shaker card or use an action wobbler, which is what I chose to do.


I used some of my favorite colors along with Honey the Bear for this fun Accordion Card.  As it turns out, the label from the Circles & Labels die fit very nicely on the circle of the Accordion Circle Card.  I used hearts and flowers from various Pop it Ups dies sets to finish it off as well as a couple butterflies from the Butterfly Pivot Card.  The letters in the word Hugs is from a retired set that I got long ago from Stampin' Up.
 
There are lots more fun card for you to see at the team member sites so hope you will stop by for a visit and lots of inspiration.
 
Karen Burniston http://karenburniston.typepad.com
Caz Counsell - Valentines treat boxes with wobbling critters
Fran Sabad - beach-themed shaker card
Karen Aicken - pop-up Valentine with shaker balloon
Sandy Diller - accordion Valentine with wobbling bear
Donna Wright - http://oldredshed.blogspot.com
Shelly Hickox - http://shellyhickox.blogspot.com
Summer - Hills Painter - http://1craftypainter.blogspot.com
Raquel Mason - http://raquelmason.blogspot.com
Helen Cryer - http://diningroomdrawers.blogspot.com
Kelly Booth - http://cruzinkellster.blogspot.com
Frances Byrne - http://stampowl.blogspot.com
Have a fun and creative week,