Showing posts with label Chameleon Pens. Show all posts

Thursday, October 1, 2015

Art Journaling with Tim

 
Hi and welcome -

Before I get started on today's challenge I just want to let you know that we are looking for a couple of new Creative Guides at A Vintage Journey.  If you like vintage and love sharing what you create this is the place for you.

For anyone who may be interested we are looking for
  two new Creative Guides 
to join our talented team. If you would like more information and details please email Brenda at brenda_brown25@hotmail.com by Monday 5th October.

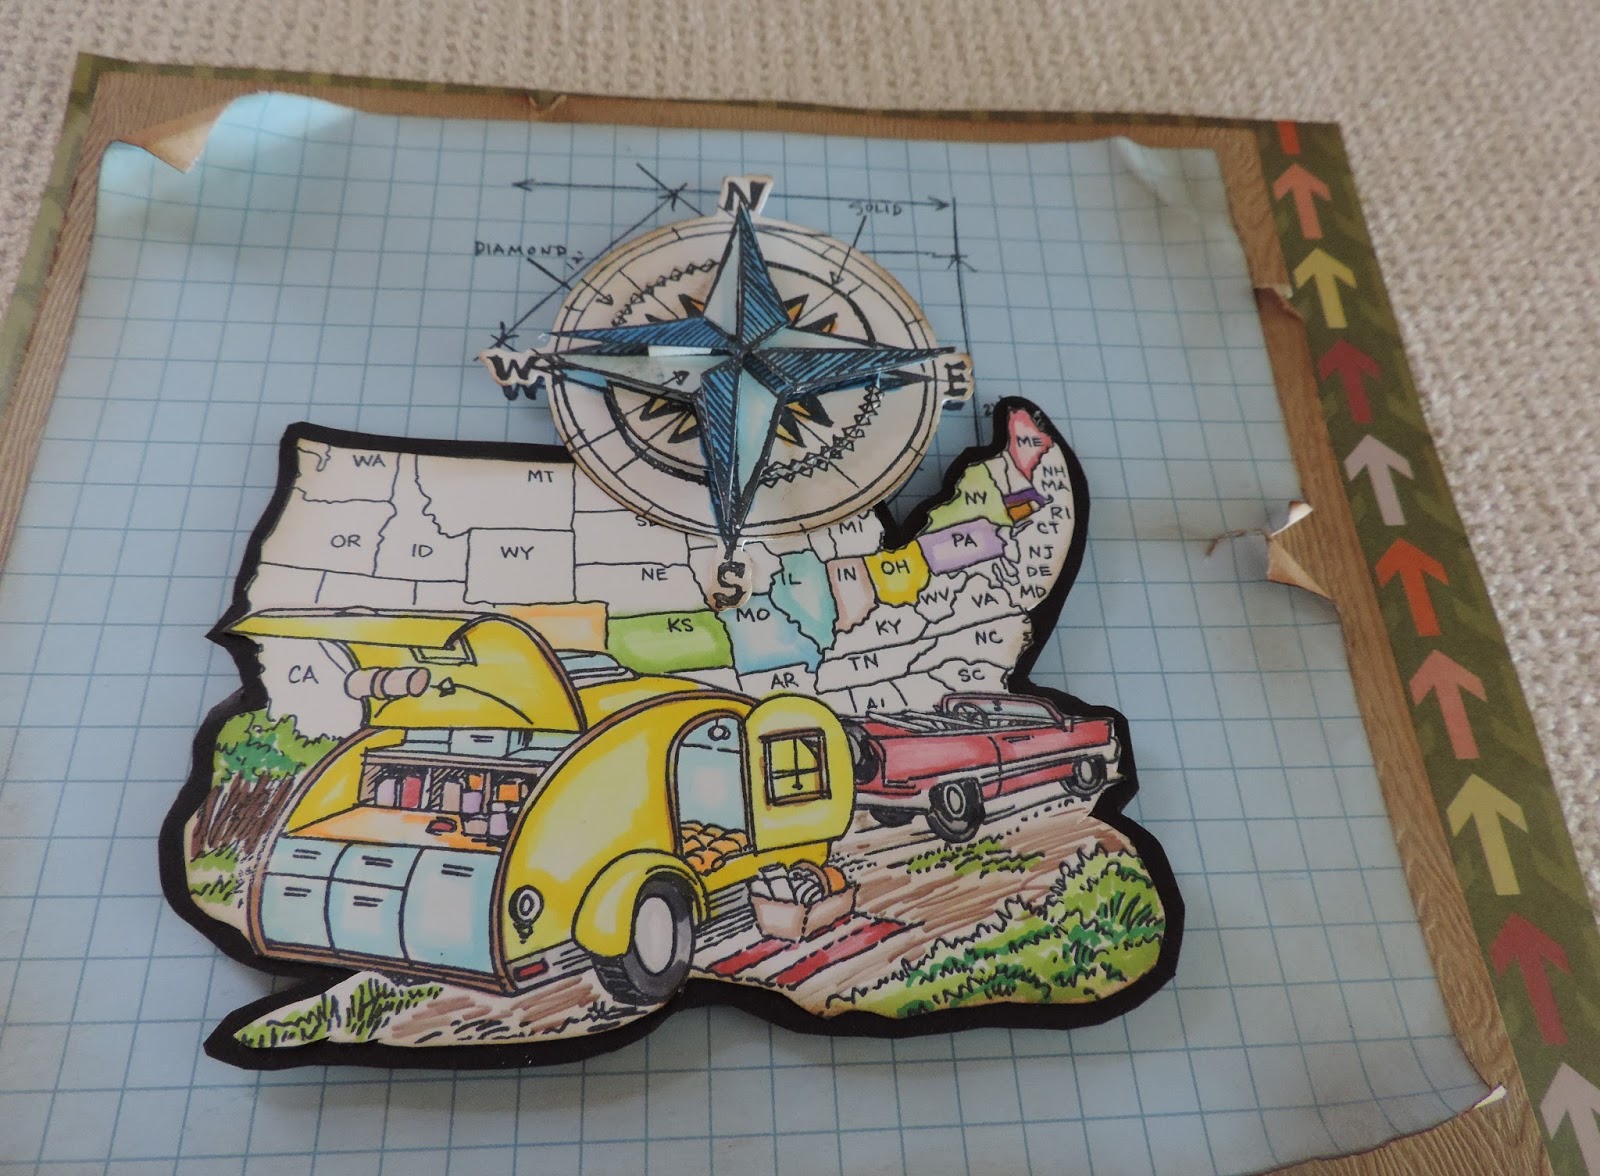
Today is a new challenge at A Vintage Journey hosted by the lovely Alison of  Words and Pictures.  I was delighted when I saw her challenge, Art Journaling with Tim, because I seem to procrastinate when it comes to journaling.  I did a two page spread and really packed it full of Tim's products and techniques.
 
I  had no idea where I was going with this but as I started, it just seemed to flow into a fun page.
Hope you enjoy----


Here's How I Did It-


I already had some pages with gesso on them so used those.  I had torn one page but
took off a little more. 
 

Using some of Tim's Tissue Wrap, I covered the full page on the left and went up to the torn edge on the right.  I secured the tissue down with gel medium.  When it had dried, I rubbed on more gesso with a damp baby wipe.  I wanted to push the paper to the background without covering it completely.   

 
 Next came some Distress Paint, Broken China and Peeled Paint.  I cut the butterflies from another tissue wrap and put them on with gel medium.  I curled the edges of the torn page to fit around the butterflies, then added some Walnut Stain Distress Ink.  I have tons of washi tape but never seem to use it - so decided this would be a good time.  After adding rows of the colorful tape I glued the torn page to the page below, actually using 3 pages of  the journal.  I like how blue and orange work together so used those colors and then used some Rusty Hinge Distress Ink on the top. Some tape and ink were also added on the lower left corner.  A piece from the Mixed Media Die Set was added to the top right.

 
Next came the molding paste using some of Tim's Layering Stencils, Wildflower, for the flowers at the bottom and, Bubble, for the dots around the sides. They seemed to be so bright white so I rubbed some Cornflower Blue Archival Ink on, very lightly, with my fingers.  The large letters are Grunge Board colored black.  The smaller letters were stamped on.  For the finishing touches, a Pen Nib, a Keyhole and Leaves along with wire were added.  Some random stamping with a script stamp and then edged with Archival. 


The final step was to add some color to the butterflies.  I used Chameleon Pens for that.
 If you haven't tried Art Journaling yet, procrastinate no longer. It's fun and easy.

Hope you have an "Artful" weekend,
S@ndy


Monday, September 21, 2015

Fly---


Hi friends,
 
Just a fast fly by (pun intended) with a Halloween Card that was fun, fast and easy.  I love Halloween cards with there bright colors against the dark moody blacks and purples. Enjoy!
 
 
For this card I used two of  Karen Burniston's Pop it Up Dies from Elizabeth Craft Designs, an
Art Impressions stamp, Girl's Night Out, colored with Chameleon Pens.
 
Dies Used:
Accordion Circle Card #769
Square with Circle Frame Edges #770
 
Have a great week,
 

Thursday, July 2, 2015

From Cactus to Coast

Hi all and welcome.  Today is the start of a new challenge at A Vintage Journey where the theme is
Destinations.  This is the perfect time of year for this challenge as many of us are traveling to a special destination or have already arrived and enjoying a change of scenery.  If not already there, I'm sure plans are in the works.
 
As for Mac and I - we are on our annual RV trip and so far have traveled more than 3000 miles.  We still have many more miles to add to the odometer and looking forward to seeing what's around the next bend in the road.   
 
I'm sharing a page I made for my "Summer 2015" Scrapbook.  Fortunately, I am able to take some of my paper crafting materials and tools with me and usually have a completed scrapbook by the time we return home.  This page depicts the first leg of our journey where we started from our home in Arizona, where we have giant cactus, to our arrival in Bar Harbor, Maine where it's all about the coast and the beauty found here.
 

 This fabulous stamp from Stampendous with the vintage trailer and car was a gift - I thought it perfect for this page.  I like to add items to my scrapbooks that are not photos but still tell the story of the trip or event.  Other fun items are maps, broachers and tickets from special events.  Using my Chameleon Pens I  colored only the states that we traveled through on this trip. I cut out the image and then backed it with black cardstock, then popped it all up on pop dots. I colored the cactus & added it near Arizona and then the seahorse, shell and ships wheel near Maine.  As you can see - I also used lots of Tim's goodies here including his Blueprint Compass Die and Stamp Set, his Adventure Words the clip & Journey tag.  When I got to this point I thought it still needed a little somethin' so added   stenciling using Tim's Clock Layering Stencil.   I don't have a full tutorial but have snapped a few pictures along the way.  Hope you enjoy -


Enjoy the Journey-

Wednesday, January 7, 2015

What's New

Hi My Blogger Friends,
 
Today I have a card to share with you that I made with an Art Impressions Stamp and will be entering it in their challenge, What's New.
 
There are actually two new parts, one is the cute stamp set I got from Michael's.  They are carrying 5 sets and of course I got all of them.  I just thought this flying couple was so stinkin cute I just had to make a card with them. The second thing is a brand new set of Chameleon Markers - this is my first go with them. 
 

I plan to make more of this one for the men's birthdays in 2015.  That will be a change for me since I usually wait until it is time to send the card before I make it.
 
Hope you enjoy and will leave me some comments.