Friday, August 28, 2015

Near or Far, Just Tweet!

Hi again my crafty friends,

I am stopping for a quick visit today to share a cute little creation using the Tim Holtz Crazy Birds
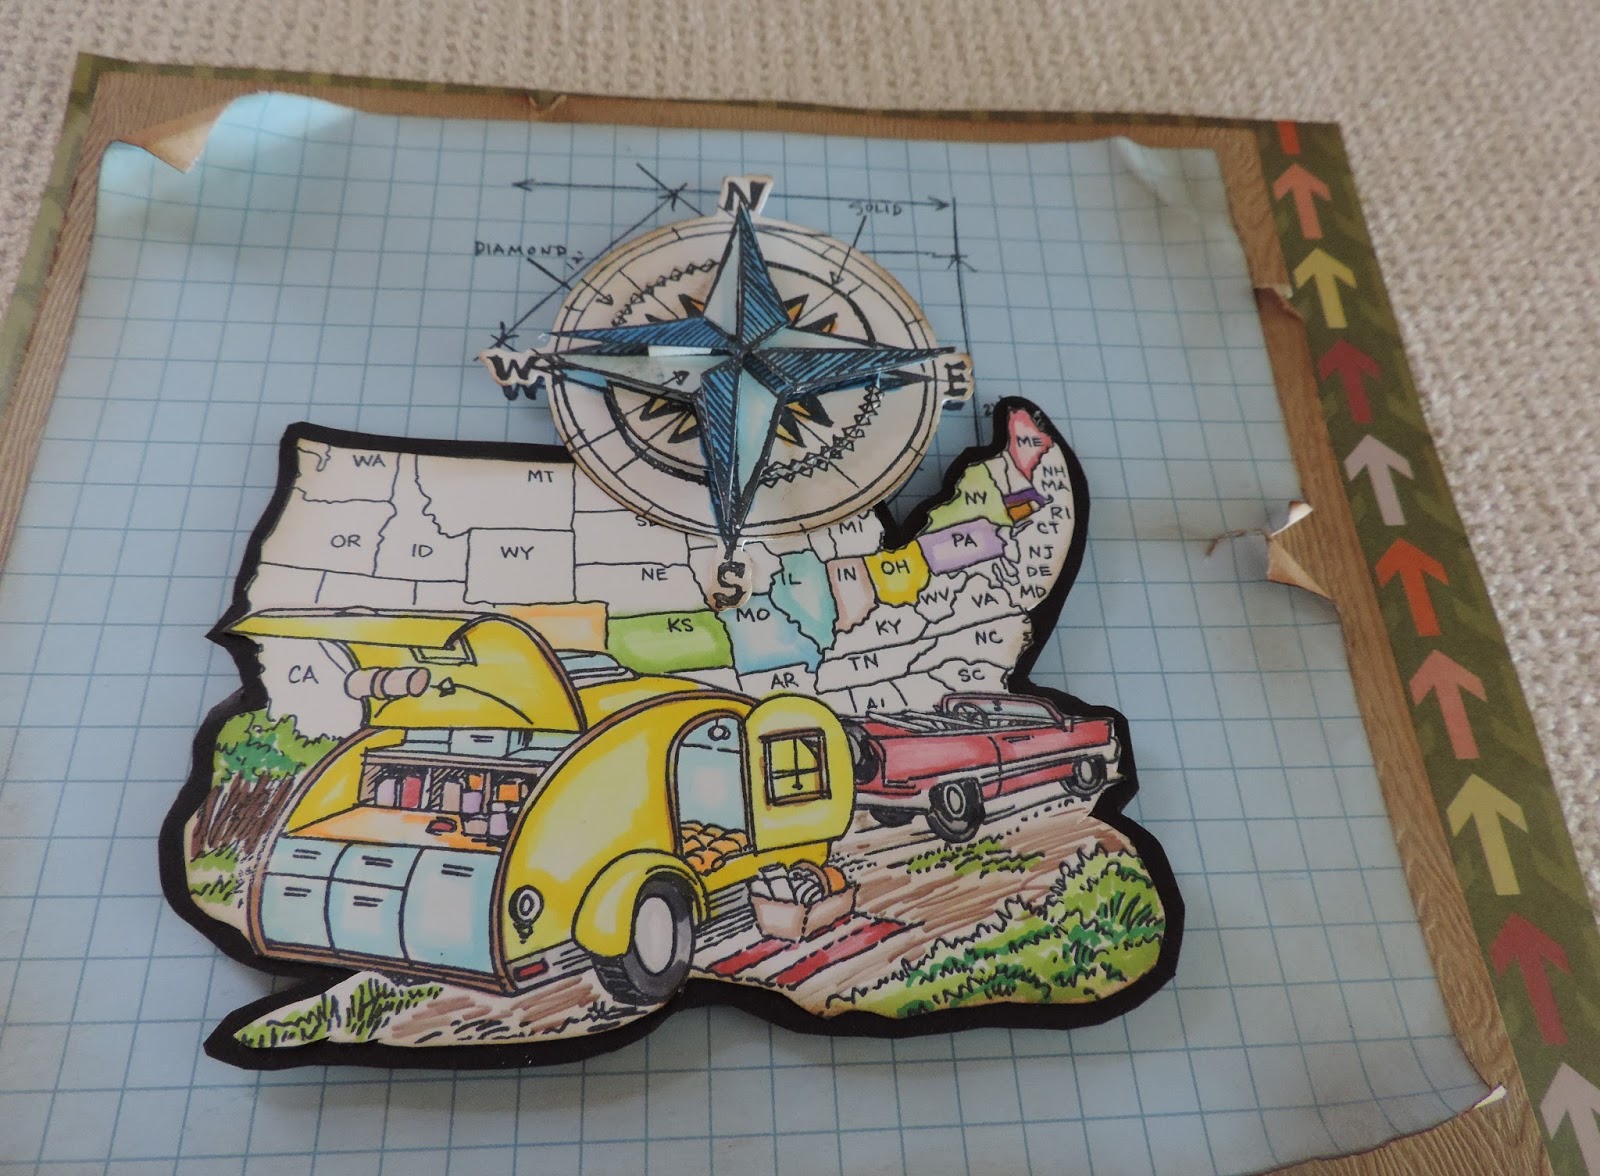
Stamps and Dies Set.  Also the Crazy Things Stamp Set which is so much fun.  I tried out a new technique, for me, on my last post which was to use stamped tissue paper.  I was happy with the face on my Steampunk girl so thought I would try it on a bigger scale. It worked beautifully.  I used the Tim Holtz "Enjoy the Journey" Stamp and Die Set for this one.

Near or far, just tweet!


After stamping the compass image on tissue paper, I embossed it with white embossing powder.  I added it using gel medium to a wood block that I had already painted blue.  Next I added more parts of the compass that had been stamped and embossed on blue paper.  I added feet to the block and a flower on top.  Below is a side view.

 
I really get a chuckle out of these birds and hope you do as well. 
Until next time-
Stay Crafty,

Wednesday, August 26, 2015

Steampunk Wingz

Hi my crafty friends,

I am finally back from my fabulous trip through the Canadian Atlantic Maritimes.  We had a wonderful trip with no major problems but it is so nice to be back home.  I have missed my crafting and my studio.  While I was away I made lots of notes for things I want to make when I got home so I will be sharing those in the next few weeks.

While I was away my friends went to Art Unraveled, an art extravaganza in Phoenix each August.  I am usually gone in August so didn't get to go, I still can't believe they would go without me.  Anyway, my friend Cheri picked up a lovely gift for me and I couldn't wait to start working on it.  I finished it last night so thought I would share.

This laser cut chipboard kit from Grapevine Designs and Studio started out like this:


With a little work and very messy fingers it turned out like this:
What fun, thank you Cheri!!


Her wings and base are covered with dry embossed clocks and gears, on foil tape, from the Tim Holtz line of Texture Fades from Sizzix.  They were then colored using Alcohol Inks from Ranger.  For her face I used a domino stamp, sorry - don't know the brand, stamped on tissue paper and then added using Gel Medium.
 
I perched her on an old tin that I had in my stash and then added the
idea-ology Letterpress word Wingz.  I embossed each letter with a different color of embossing powder.  The photo below shows the letters close up.

 
I had so much fun with this and since I see that the current challenge over at
Mixed Media Monthly is  "Get Texty" she will be flying over there as my entry.

 
Enjoy the rest of the week,


Monday, July 13, 2015

Santa "Claws" is coming to town .....


Hi and welcome—I’m sharing a card today that I made for Karen Burniston’s monthly challenge. The theme for this month is "Homegrown Holidays" so I decided on "Christmas In July".  I’m so lucky that Karen allows me to guest design on a regular basis.  I love the challenges and have fun figuring out different ways to use her great dies.  I usually have a tutorial but this time I’m just going to show the finished card because I’m not at home.  Mac and I are on our annual RV trip and currently in Canada enjoying a tour of the Maritimes. 
 
I've used Rocky The Crab on the beach in the Adirondack Chair wearing his Santa hat and holding a Christmas gift.  I decorated the palm trees with lights and bulbs.  Rocky is quite the festive Santa "Claws".


Merry Christmas in July!
 
Dies Used:
Holiday House #916
Adirondack Chair Po p Up #975
Rocky the Crab #985
Palm Tree & Pail#987
Beach Edges #981
Merry Christmas #944
Evergreen Pivot Card #912
All Seasons Tree #781
 
Have a wonderful week,

Tuesday, July 7, 2015

You'll be old when......

Hi all,

Just a quick stop to share a card I made for a friend who is having a birthday.  We are traveling around Canada (so beautiful!!) with a group of RVers (25 rigs in all).  One of our traveling buddies, Fred, is having a birthday so I made a card for him.


I hope he enjoys it as much as I enjoyed making it.  It was a giggle all the way through the process.
 
I used Karen Burniston's  Rectangle Pull Card and Virgil the Pig along with the Alphabet & wings from the Heart with Wings die, all from Elizabeth Craft Designs.
 
Enjoy,

Thursday, July 2, 2015

From Cactus to Coast

Hi all and welcome.  Today is the start of a new challenge at A Vintage Journey where the theme is
Destinations.  This is the perfect time of year for this challenge as many of us are traveling to a special destination or have already arrived and enjoying a change of scenery.  If not already there, I'm sure plans are in the works.
 
As for Mac and I - we are on our annual RV trip and so far have traveled more than 3000 miles.  We still have many more miles to add to the odometer and looking forward to seeing what's around the next bend in the road.   
 
I'm sharing a page I made for my "Summer 2015" Scrapbook.  Fortunately, I am able to take some of my paper crafting materials and tools with me and usually have a completed scrapbook by the time we return home.  This page depicts the first leg of our journey where we started from our home in Arizona, where we have giant cactus, to our arrival in Bar Harbor, Maine where it's all about the coast and the beauty found here.
 

 This fabulous stamp from Stampendous with the vintage trailer and car was a gift - I thought it perfect for this page.  I like to add items to my scrapbooks that are not photos but still tell the story of the trip or event.  Other fun items are maps, broachers and tickets from special events.  Using my Chameleon Pens I  colored only the states that we traveled through on this trip. I cut out the image and then backed it with black cardstock, then popped it all up on pop dots. I colored the cactus & added it near Arizona and then the seahorse, shell and ships wheel near Maine.  As you can see - I also used lots of Tim's goodies here including his Blueprint Compass Die and Stamp Set, his Adventure Words the clip & Journey tag.  When I got to this point I thought it still needed a little somethin' so added   stenciling using Tim's Clock Layering Stencil.   I don't have a full tutorial but have snapped a few pictures along the way.  Hope you enjoy -


Enjoy the Journey-

Monday, June 15, 2015

What's in a Name???

Hi my friends,

Today I'm sharing a graduation card I made for this month's Karen Burniston Challenge.  She has asked us to use her fabulous "Pop it Ups" dies that are based on our own initials.  I have used the "S"piral Pull Card Die and the "D"utch the Fox Character Die.  
Here"s what I came up with.


As you can see I decided to go with "Make A Stir" - that brought to mind the stir caused by a fox in the hen house. The arrival of Dutch in the henhouse has caused the chickens to be worried and their eggs are flying every which way.  I used the tongue from the Buster the Dog Die with Dutch licking his chops for those eggs.

I used clear acetate for the spiral to make the eggs and nest appear as though they are flying through the air.  Below is a close up of the spiral with the eggs.


Dies Used  - all from Elizabeth Craft Designs

Spiral Pull Card #916
Dutch the Fox #946
Barn #1021
Cheepers the Chicken #1023
Hay There Pop Stand #1025
Alphabet 1 #967
Numbers & More #968

Hope you have enjoyed my take on the theme this month and don't forget to check out what the design team made on the Elizabeth Craft Designs Blog on Wednesday June 17.

Have a great week,
S@ndy
 

Thursday, June 4, 2015

Celebrations @ A Vintage Journey

Hi and welcome - today we are sharing the Celebrations of life over at
A Vintage Journey.  It is my turn to host and I invite all of you to show what you celebrate during the month of June.  Simply make something showing a celebration and link it up, you could be the lucky winner of a great prize.  You will, as always, be treated to awesome inspiration from the Creative Guides.  Your creation can celebrate the last day of school, a graduation, an anniversary, a wedding, Father's Day or a birthday.

I made a colorful accordion card using Tim's Birthday Blueprint Stamp Set from Stampers Anonymous and Karen Burniston's Katie Label Accordion Die from Elizabeth Craft Designs.


Here's How I Did It!

 
 I stamped the Blueprint Stamps on white paper.
 

I colored them with my Chameleon Pens and cut them out.

 
For the base of the card I cut the Katie Label Accordion four times from manila cardstock, stamped the panels and connected them together. 
I edged the entire thing with Mermaid Lagoon Distress Ink. 
Next the colored pieces were added to the panels


After cutting the Katie Stars Frame Edges from 4 different colors they were added to each panel.  The final step is to connect the panels with the tabs making the accordion.


Celebrate something special in June-