Showing posts with label Gnome. Show all posts

Wednesday, September 28, 2022

Happy Fall Y'all

 Hello Friends,

  Although it is still blazin hot here in Arizona, I know it's beginning to cool off in other places. That made me think about a cute little garden gnome.  While I love any kind of gnome this one is especially cute because he also lights up.


In this photo you can see him greeting guests on my front porch and he is totally adorable with his fall colors.


 Here he is after dark - still greeting our guests.
 

I began with the Medium Wood Gnome 1 from Clear Scraps for this one.


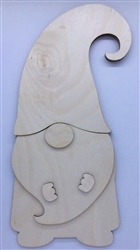
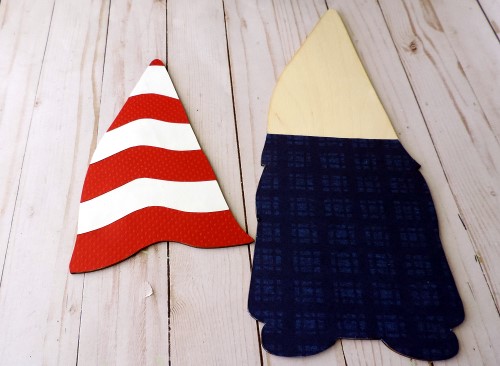
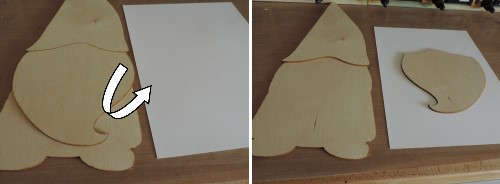
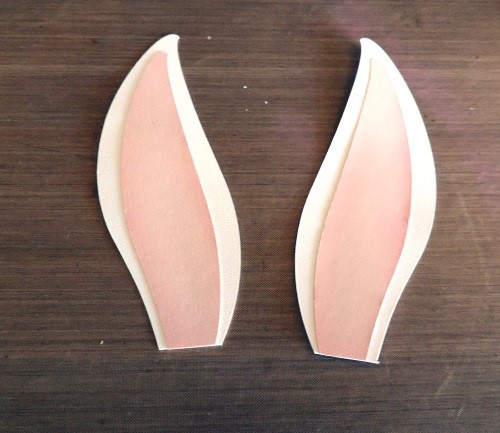
 I began with covering parts of the base with paper, then the hands and nose were edged with a little pink,


 The beard portion was painted with orange and some small holes were drilled.
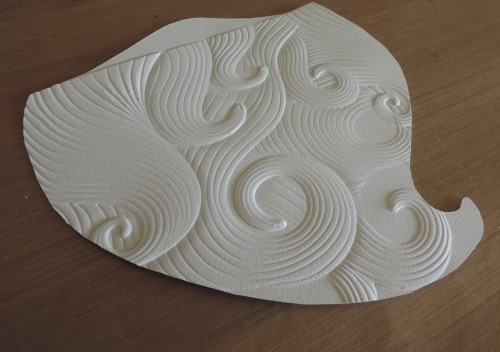
A string of battery operated lights were placed through the holes.  Some (lots) leaves were cut out of vellum.
By using vellum the light will shine through.


 The entire beard and lights were covered with leaves - leave space for the nose.
 
 
On the back of the hat and beard pieces I used double sided foam tape to lift the pieces up leaving room for the lights.
 
 
 A Happy Fall Y'all sign was added and the nose and hands glued on.
 
 
Thank you so much for stopping by - hope you got some inspiration.

S@ndy


Wednesday, June 22, 2022

Happy Birthday America

 The 4th of July will be here soon and I love the colors of our country.  I've decorated this adorable gnome to celebrate the season.  


This project was fun and easy.  I began with the Medium Wood Gnome Girl shown below and then simply added the colors I wanted.  


I first covered the hat with alternating red and white strips paper in a wave pattern.  Next came the body that is covered in a blue plaid.  I used a black marker to color in the feet.

Before the hair was added it was embossed to give texture and then edged with some brown ink.  Every patriotic gnome needs a red bow.

The nose, hands and the star were all decorated and edged with the proper color. (blue was added to the heart later).


All the pieces were placed - some white stars were added and then glued in place. I added the flag before gluing the hands.

I like to mix things up sometimes to I used the "Summer" from the Word n Shape Summer - Flip Flop.  You will see the Flip Flops later in another project.  I painted the word blue to match the theme.


To make this little guy stand up I used the base from one of the Frameables, covered with paper and                                            then added some grass using a die from my stash.


Now that all parts are assembled she is ready to party!!

Friday, April 1, 2022

GnomeBunny Like You

 Hello friends,

I'm here today to share a fun little Easter project with you that I hope will bring a smile to your face.  This adorable Medium Wood Gnome 2 is from Clear Scraps and all I did was add some cute paper, bunny ears and some Easter eggs.  I hope you like it. Our little friend has been on a successful Easter Egg Hunt.


I began with the beard - since I am using textured paper I flipped the beard piece over and then traced and cut it out.


Before adding the beard to the Gnome, I used an embossing folder to add texture.  This folder is actually a wave pattern turned upside down.


Next I selected some paper and then used my Xyron machine to make it sticky, you could also use glue or double sided tape.  I covered the wood pieces with the paper and then sanded the edges.  I used some ink to add color to the edges and give it highlights.


Next came the ears - these were made using my electronic die cutter but they can be easily made by drawing the shape on white paper and cut our using scissors. The ears are are 5.5" tall and at the widest point they measure 1.25".


To make this little guy stand up I used the base from one of the Frameables, covered with paper and then added some grass using a die from my stash.


The two base pieces were stacked together lining up the openings.


Just for fun the flower from the Word n Shape Friends-Flower was added.


For the finishing touches the hands and nose were covered with paper and some colorful Easter Eggs were added.


Thanks for joining me today,

Sandy