Sunday, January 18, 2015

Hello Love

Hi my friends,

I'm having a "play day" so thought I would share with all of you.  Since it is only a play day for me - no tutorial, just photos.
 
I have been playing with the new Karen Burniston Pop it Ups Dies and the first one I decided to try is the Tag Pivot (973) - Love it! (pun intended) So now I need to get busy on a card for the challenge this week using three different dies on the same card.
 
For this one I put a tag within a tag by using the Tag Die from
Elizabeth Craft Designs(951).


Hope you enjoy -
Have a crafty week!  I know I will.
 

Wednesday, January 14, 2015

My CHA Adventures

Hi Everyone,

I'm back from CHA 2015, very tired but happy.  I went to Anaheim with friends to see what we could see and we had a great time, saw our favorite designers and looked at some wonderful new products. 

The fun began on Friday night when Michael's sponsored a nice party with a band and a give away of an art journal.

We stopped by the Elizabeth Craft Designs booth and had a nice chat with designer, Karen Burniston.

While we were there, we did a fun "make & take" using some of her new release.
 
 
For this card we used the Eiffel Tower Stand Up along with the Paris Edges.
 
How cute is that????
These great new dies will be in your local stores around the end of the month.
 
Of course no show would be complete without a visit to The Ranger booth to see Tim.
 
 Tim is always so gracious and it is wonderful to watch his demos.
We saw some fantastic art which I will show you at the end of this post.
 
While at Ranger we got to see all of our favorite designers and artists.
So fun to talk to Wendy Vecchi and Tammy Tutterow.
 
Next we were off to Sizzix -
 Eileen Hull was showing all her new line for this show, so cute!!

 
While at Sizzix, they were giving away the new Wordpress Station and I was lucky enough to get one.  I'm happy!!

 We also did a "make & take" using the new Transfer Sheets - these are cool.  We each got some samples to take home.  How nice is that?
 
Here's the whole gang having fun at Idea-ology!
 
Here is what we made.  So nice to have a direction and suggestions for some of these new items in the line.

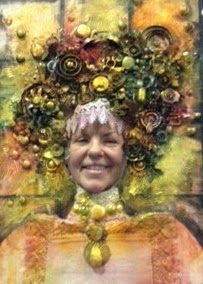
 Next stop was Prima where we took our photos in this spectacular piece of art.

So excited to meet Anna (Finnabair)
 
We made this beautiful card while visiting at Heartfelt Creations.
 
We did this great card front at the Penny Black Booth.

Here are a few more photos taken at the show-


Well my friends, that's it for today-
Got to get busy now writing some comments and perhaps doing some work around my house, it needs it!
 

Thursday, January 8, 2015

Use A Portrait @ A Vintage Journey

Hi Everyone,

Welcome, today I'm the host over at A Vintage Journey where our new challenge is:
 
USE A PORTRAIT
 
All of us Tim fans know how much fun it is to use his "Found Relatives".  This time around I decided to use one of my own relatives, one of our beautiful granddaughters, Megan.  I have been wanting to do some mixed media and this was the perfect opportunity.
 
To see more great inspiration please stop over at A Vintage Journey by clicking here to see what the talented Creative Guides have made.


HERE'S HOW I DID IT!
 
 
I started out with an 8 X 10 canvas, added gesso, some tissue paper, some hot glue and then used Tim's Harlequin Layering Stencil with some embossing paste.  Then of course, I covered it with gesso again. 


Next I looked through my stash of Grunge Board punch outs, I got these some time ago on sale and as you can see, I bought them all. 
They are perfect for this kind of project.


I placed all the pieces where I thought I wanted them and glued some of them down.  As always, I changed my mind a few times before I added the final glue.  I used the Postage Stamp Die for the frame.  I embossed the center section for more texture.


After making my decision, another coat of gesso.
 
 
Next came the sprays and paints, I really can't explain how I do this, I just keep adding paints and sprays until I have the desired results.  I don't have any of the new Distress Spray Stains so I used my regular stains by removing the top of the bottle and pouring it in a Mini Mister.  Worked just great.  As you can see from the photo, I used sprays, brushes and baby wipes but the best tool of all is your fingers. 
A bit messy but worth it. 
 
The very last bit was to print and cut out my portrait,  I edged around it with Distress Ink and glued it into the frame.  I like the effect I got from gluing the bottom section to fit the frame with the top coming over the frame.
 
 
I hope you've enjoyed my messy but fun project and will join the challenge
 this time around.  Let's see some of your found relatives.


Wednesday, January 7, 2015

What's New

Hi My Blogger Friends,
 
Today I have a card to share with you that I made with an Art Impressions Stamp and will be entering it in their challenge, What's New.
 
There are actually two new parts, one is the cute stamp set I got from Michael's.  They are carrying 5 sets and of course I got all of them.  I just thought this flying couple was so stinkin cute I just had to make a card with them. The second thing is a brand new set of Chameleon Markers - this is my first go with them. 
 

I plan to make more of this one for the men's birthdays in 2015.  That will be a change for me since I usually wait until it is time to send the card before I make it.
 
Hope you enjoy and will leave me some comments.

Monday, January 5, 2015

January - 12 tags of 2015

Hi all my blogger friends,

Just stopping by with my January Tim Tag.  Last year I fell a little short with my tags so will try harder this year.   Here is my tag for January and it's only the 5th.  You can see Tim's inspiration here.  I used the same techniques - I didn't have the same stickers as Tim so I used some calendar Salvage Stickers.

 
It was fun and I hope you have enjoyed my take on the January tag.
See you soon,

Tuesday, December 30, 2014

Happy! Happy! Happy!

Hi

Today is one of those days that I'm not pressured with deadlines to meet so thought I would take advantage of it with a fun card.  A while back I downloaded the Happy song by Pharrnell Williams and I love it.  It makes me feel good each time I hear it.  Of course it goes along with those crazy Minions from "Despicable Me", I love to watch their clips on YouTube, so that is the theme for today.


I used the Karen Burniston Spiral Circle Pull Card die for the base and rounded the top edges.  Here is the front of my card when it is held closed by the tabs.
 

Here he is with the card completely open.  I had to add the phrase "I Only Have Eyes For You" because that's my idea of humor. I don't have a tutorial for you today since I was just having some fun.

Have a safe and fun New Year celebration!

Thursday, December 25, 2014

Ring out the old, ring in the new.

Hello fellow travelers,

Today we are beginning a new leg of our Vintage Journey with our host, the talented, Brenda.  Her challenge to us is to use this poem by Alfred Tennyson.
 
“Ring out the old, ring in the new,
Ring, happy bells, across the snow:
The year is going, let him go;
Ring out the false, ring in the true.”      
Alfred Tennyson
 
Focus on these key words from the poem - old, new, bells, snow, year and
interpret one or more of them in anyway you like. 
 
Here is my interpretation:
 
 
 This project actually turned out to cover several lines in the poem.  Back in October I posted a Halloween project using Tim's Assemblage Clock.  Shown below.  As crafters we like to make all sorts of things and I like to make things for challenges. The problem is, what to do with them when you're done?  This time around I decided to
upcycle the Assemblage Clock.   I took it all apart, covered it with gesso and then added a thick layer of Silver Stickles.  The purple came through in a softer, lovelier shade.   I rather liked it.  Ring out the old, ring in the new.


After digging around in my studio I found the glass that I had previously removed and glued it on the front of the clock on the outside.  Next I cut out a ring for the front to cover my glue line.   I found some bells at the dollar store that were perfect for this project and filled the inside of the clock.  Ring, happy bells, across the snow.


Next I cut the XII from the Weathered Clock Die and added it to the top of the clock.
I used some of Tim's Type Charms .  After cutting off the loop on top and filing them down I added the numbers using my electronic cutter.  I brushed on some Silver Stickles before adding the epoxy dots.  On each side of the XII I added the years 2014 & 2015.  The year is going, let him go.
 
I filled in the back with a picture of an hour glass. 
My original thought for the top of the clock was to use a wire edge ribbon to add a large bow.  After giving that some thought I decided to use curling ribbon so I could add streamers like you see on New Year's Eve.  Ring out the false, ring in the true.
 
 
 Here's wishing you a "safe" and happy new year celebration.  Best wishes for the coming year.

S@ndy