Thursday, July 4, 2013

Happy 4th of July!!

I hope everyone is having a wonderful day.  It is HOT, HOT, HOT here in Arizona but, as always, a great day in the good ole'  USA


I just wanted to take a minute to share this little patriotic shadow box with you.  I made it with the 4th in mind but will also use it for my tag entry over at Tim's blog for July.
Since Simon Says Stamp and Show has "Anything Goes" this week I don't see any reason not to enter it there as well.  Hopefully the third time will be the charm as Inspiration Emporium is having a big birthday celebration for America. Why not go for it?


I constructed the box myself out of some scrap pieces of chipboard using tape and glue.  I only wanted it 1/2 inch deep so it didn't take much. When it was all put together I used the Postage Stamp Die and Grunge Board for the front and then painted it with Ranger's Crackle Paint.  When dry, I used Fired Brick Distress Stain to color it.  I covered it inside and out with some of Tim's Holiday Paper and attached the Postage Stamp Frame.  Using some pop dots I attached Uncle Sam, a free downloard from Karen Burniston, on the inside of the box.

Side
 
Add a little ribbon and a Rossett
 
A Tattered Banner & some bingo numbers and you're done-
 
Happy Birthday America

Friday, June 14, 2013

June Tag With A Twist

Now that I've settled down from being on Tim's Blogworthy Links it's time to post my June "Tim Tag".
 In my world it just seems that Karen Burniston Dies and Tim Holtz Stamps were made to work together.  This month I used Karen's Twist Cube Die (I've  posted the links to the instruction videos at the bottom) and Tim's Birthday Blueprint Stamps. 


A fun Birthday Card with a special twist of festive elements inside.
Just untie the bow for a surprise! (get it? Surprise!!)

                                        When the card is opened the inside looks like this.


With a simple pull of the knob it pops up to become a 3-D canvas of birthday fun.
                                                
                                                    So let's give it a whirl -


Tim used Distress Markers on his tag, however, I don't have those yet so had to use other resources.  I chose to use Distress Stain and a water brush.  I couldn't use watercolor paper because it's too thick to twist correctly so I used white cardstock.  Using the stains on cardstock was a little tricky because the color behaves differently than on watercolor paper. 
            I made a few practice runs before starting to paint on the die cut pieces.

                                                A few "easy" steps later --
                Start out by cutting all the pieces on the die as shown in the instructions.

This was both fun and challenging - making sure the stamps were right side up after the cube is assembled was interesting.  Thankfully Karen made the side and top tabs different sizes so that helped.  Thanks Karen, I'm sure you did that just for me! 
I stamped all the images in black and then embossed with clear embossing powder from Ranger.

After painting all the images -  assemble the cube following the directions that come with the die or watch the video. In my case - several times.

For the outside of the card I simply covered chipboard cut to the proper size and covered with paper.  Be sure to make the side panels high enough to accommodate all the embellishments on top of the cube.  Since I choose to use a knob the sides are nearly 1".

This was a fun project - A Party In A Card - Enjoy!!

Here are the links to Karen's instruction videos:

http://www.youtube.com/watch?v=A1O8orgD7_o

http://www.youtube.com/watch?v=29JOMWg-9nM

Tuesday, June 11, 2013

Happy Dance!!

Just had to share the news that my post "Time Traveler" has been mentioned on
Tim Hotz's blog today.   That makes me do the HAPPY DANCE!  Click on the link below to see all the amazing artists in Tim's Blogworthy Links.


                                   http://timholtz.com/blogworthy-links-3/

Tuesday, May 28, 2013

Giddy Up!

Don't ya just love it when a plan comes together?

I need a card for my Dad's birthday tomorrow and was at a loss for a theme.  Then Simon Says Stamp and Show presented their weekly challenge with "Into The Woods". Since we live in the Southwest, the wild wild west, wood makes me think rustic so I had to go with a cowgirl.

                When the card is pulled open, it reveals the message inside a box.

 I used some great wood grained paper from my stash. Last week at our Scrapbook Club meeting two ladies did a great demo on a box card and I wanted to use it before I forgot.  I will give you the cutting and scoring template at the bottom of the post.


I cut out some brown card stock on my e cutter to make the front look like barn doors.  The door panels were then embossed with wood grain.

           After stamping my greeting it was punched out with a 1.5" circle punch.

I stamped, colored and cut out my image for the front of the card.  These are some of my favorite images from an Arizona Artist, Terry Medaris.  I colored two images since I was not sure where I was going with this.  I finished off the inside of the card with two cute stickers from Creative Imaginations and a hand written message.

So for not really having a plan to start with - I think it came together pretty well.

As promised, here is the Box Card Template for those who wish to try it.


Saturday, May 18, 2013

A Stitch In Time

I have wanted to use this idea for awhile so when I saw Inspiration Emporium's challenge for this month "Quotes", I just had to put it together.  I'm not sure where this quote came from or what it "really" means but it was fun.


Starting with the Tim Holtz die - Pocket Watch - I layered rings of paper to make the watch appear real.  I used 4 layers of cardstock glued together for each size ring.


I wanted the watch to look old and tarnished so I used Antiqued Bronze Distress Stain
for the first coat and then stippled over the top with Vintage Photo.


While waiting for stain to dry, which I am not good at, I cut the Sewing "On The Edge Die" using some paper from Lost & Found that was left over from another project. I got lucky with the lettering for the word "SAVES".  I used some Rubs from my last project and cut out only the letter I needed.


For the #9 I used Distress Paint and for the bow I used the TH bias tap colored with Distress Reinkers. Although it seems an odd combination, I got just the color I was looking for by using Seedless Preserves and Picked Raspberries.  I like the way the color looks with the paper.  I printed out the banner for the inside of the clock and put it on a hanger.

The project was finished up by adding some rubs (the pointing finger) and the dress form that was cut from the Mini Sewing Room Die and embellished with some Honey Pop Paper.   

Glad you stopped by - would love some comments - see you soon.

Thursday, May 16, 2013

Time Traveler

Hi Everyone -

Today I am showing my entry for the May "Tim Tag".  This month Tim used his new Remnant Rubs which are fabulous and fun.  I used all three sets, the Numbers, Words and Rubs.  So easy to use.

As it turned out - this is a 100% Tim Holtz project - all products used are from his lines of goodies.  Got to love that!!

Start with the Assemblage Clock.


With so many shinny surfaces there is some glare and I apologize for that - I did my best to edit the photos.


I used lots of rubs both inside and out.  When the rub-ons were in place on the outside of the clock I added some Vintage Photo Alcohol Ink and some Distress Powder to make it  appear rusted.  Not only does it appear rusted but it feels rusted as well.  Just a "heads up" on adding the Distress Powder - the clock is made of metal and it holds the heat from the heat gun, be sure to let it cool before touching. 


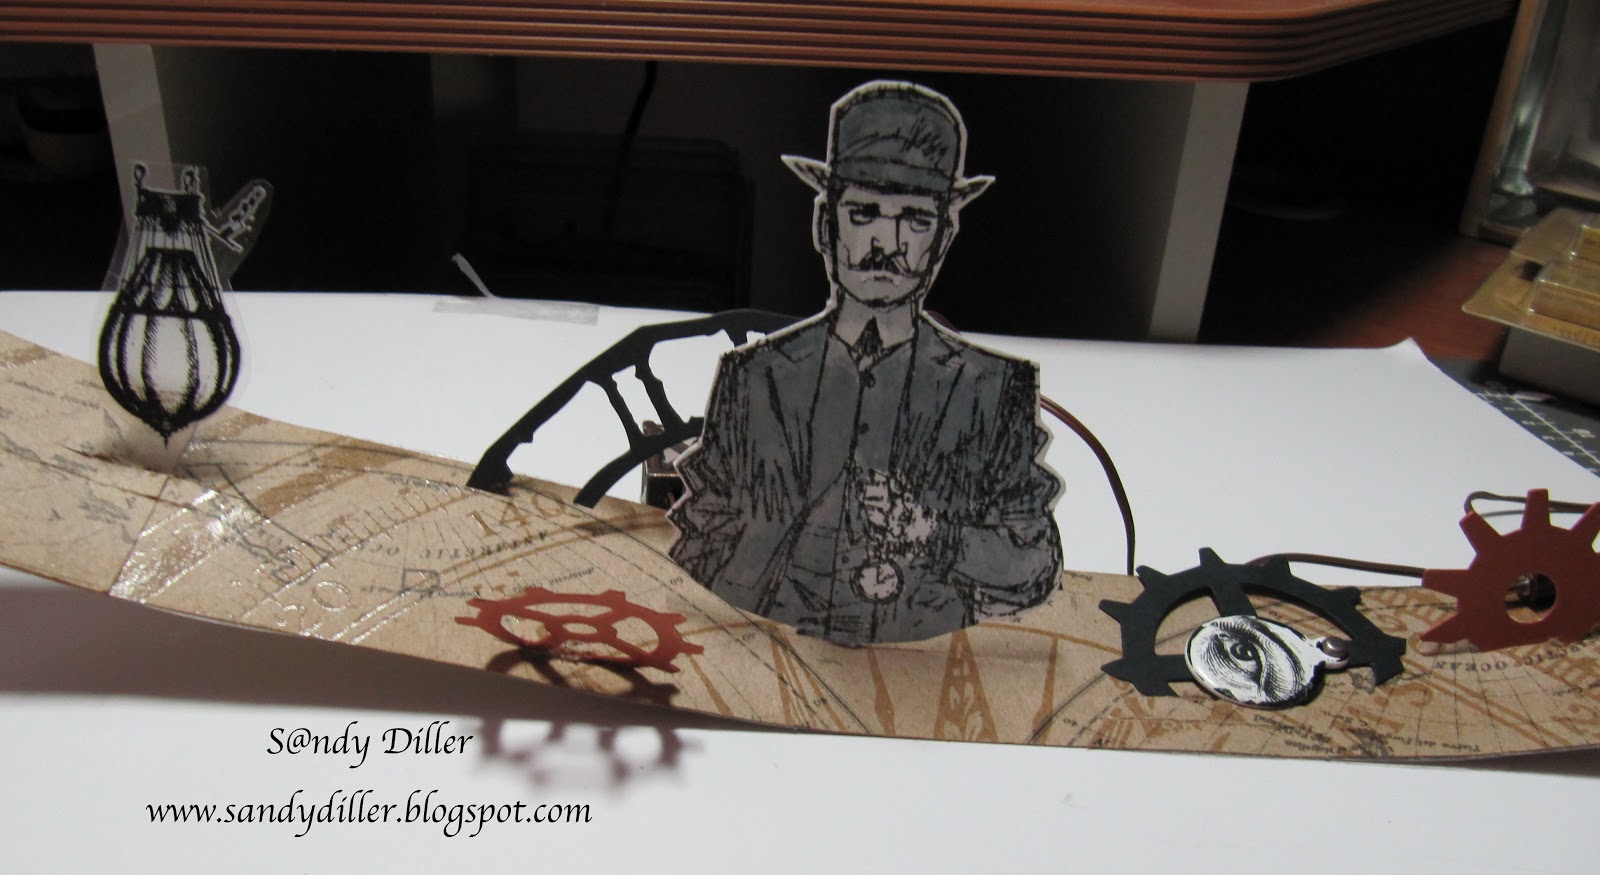
I wanted my main focal point to be the guy from the stamp set of the same name "Time Traveler".  I stamped in black on watercolor paper and then embossed in clear for the great resit it provides. I then painted my guy using a water brush and Weathered Wood Distress Stain.  I cut him out leaving a small edge around the image.


After selecting the other elements for my project I started to assemble them.  Using the "Eye" rub-on placing it on an Enameled Tag then the "Hot Air Balloon" on a piece of clear packaging leaving an extended tab at the side and top. (see arrows on the photo) Next I cut a few gears from the Mini Gadget Gears and started placing them. You will see later why the corners are rounded on the gear.


After selecting the paper from the Kraft Resist Pad I cut a circle (using a Framelit Die) for the inside of the back of the clock.  Also using Alcohol Ink for the edge.

By experimenting a little I learned that the perfect size paper to line the inside of the clock is 13.5" X 2.75".  I had to add a little piece since my paper is 12".  Add pencil lines on the back at a quarter inch apart.  Then start making slits on the lines where you want your elements.  This is what gives it the layered look when complete.


You can see that it is necessary to round off all the edges so when it is placed in the circle it stays round.  Also note that the balloon is upside down when the piece is flat.  Too funny huh? I used a small piece of Scotch Tape to hold the pieces in place and then placed the entire thing in the clock.  No need to glue the ends  because the tension of the paper and embellishments will hold it together and when the back is in place it does not move.  Hope you enjoyed this project - got to run now and post it on Tim's blog.


Monday, May 6, 2013

Thanks

Hello Friends,

We have just returned from a week at the beach in Rocky Point, Mexico.  The beach was fun and there is something about being near the water that is so restful. 

I am a little behind in my blogging so will get caught up by posting this card that I made for a friend who sent me a wonderful gift of a Pop Up Die.  It is the "Circle & Ribbon Platform Die" designed by Karen Burniston and I love the way the ribbon pulls out when the card is opened.


I used Stampin Up paper and stamps for this one but don't remember the name of the collections as they have been in my stash for a very long time.  I edged the outside of the front cover with the Tim Holtz, On The Edge Die, "Butterflight".


I also really like the way the scalloped edge of the pop up frames the outside of the circle.  This is one of my favorite color combinations, so bright and happy.  To finish it off I simply added some Movers & Shapers Butterflies and pearls.  You can watch Karen's video on how to assemble this card here.  Give it a try - it's fun and easy.

I will try to return with a Mother's Day Card later in the week so stay tuned.