
Today I am showing my entry for the May "Tim Tag". This month Tim used his new Remnant Rubs which are fabulous and fun. I used all three sets, the Numbers, Words and Rubs. So easy to use.
As it turned out - this is a 100% Tim Holtz project - all products used are from his lines of goodies. Got to love that!!
Start with the Assemblage Clock.


I used lots of rubs both inside and out. When the rub-ons were in place on the outside of the clock I added some Vintage Photo Alcohol Ink and some Distress Powder to make it appear rusted. Not only does it appear rusted but it feels rusted as well. Just a "heads up" on adding the Distress Powder - the clock is made of metal and it holds the heat from the heat gun, be sure to let it cool before touching.

I wanted my main focal point to be the guy from the stamp set of the same name "Time Traveler". I stamped in black on watercolor paper and then embossed in clear for the great resit it provides. I then painted my guy using a water brush and Weathered Wood Distress Stain. I cut him out leaving a small edge around the image.

After selecting the other elements for my project I started to assemble them. Using the "Eye" rub-on placing it on an Enameled Tag then the "Hot Air Balloon" on a piece of clear packaging leaving an extended tab at the side and top. (see arrows on the photo) Next I cut a few gears from the Mini Gadget Gears and started placing them. You will see later why the corners are rounded on the gear.

After selecting the paper from the Kraft Resist Pad I cut a circle (using a Framelit Die) for the inside of the back of the clock. Also using Alcohol Ink for the edge.

By experimenting a little I learned that the perfect size paper to line the inside of the clock is 13.5" X 2.75". I had to add a little piece since my paper is 12". Add pencil lines on the back at a quarter inch apart. Then start making slits on the lines where you want your elements. This is what gives it the layered look when complete.
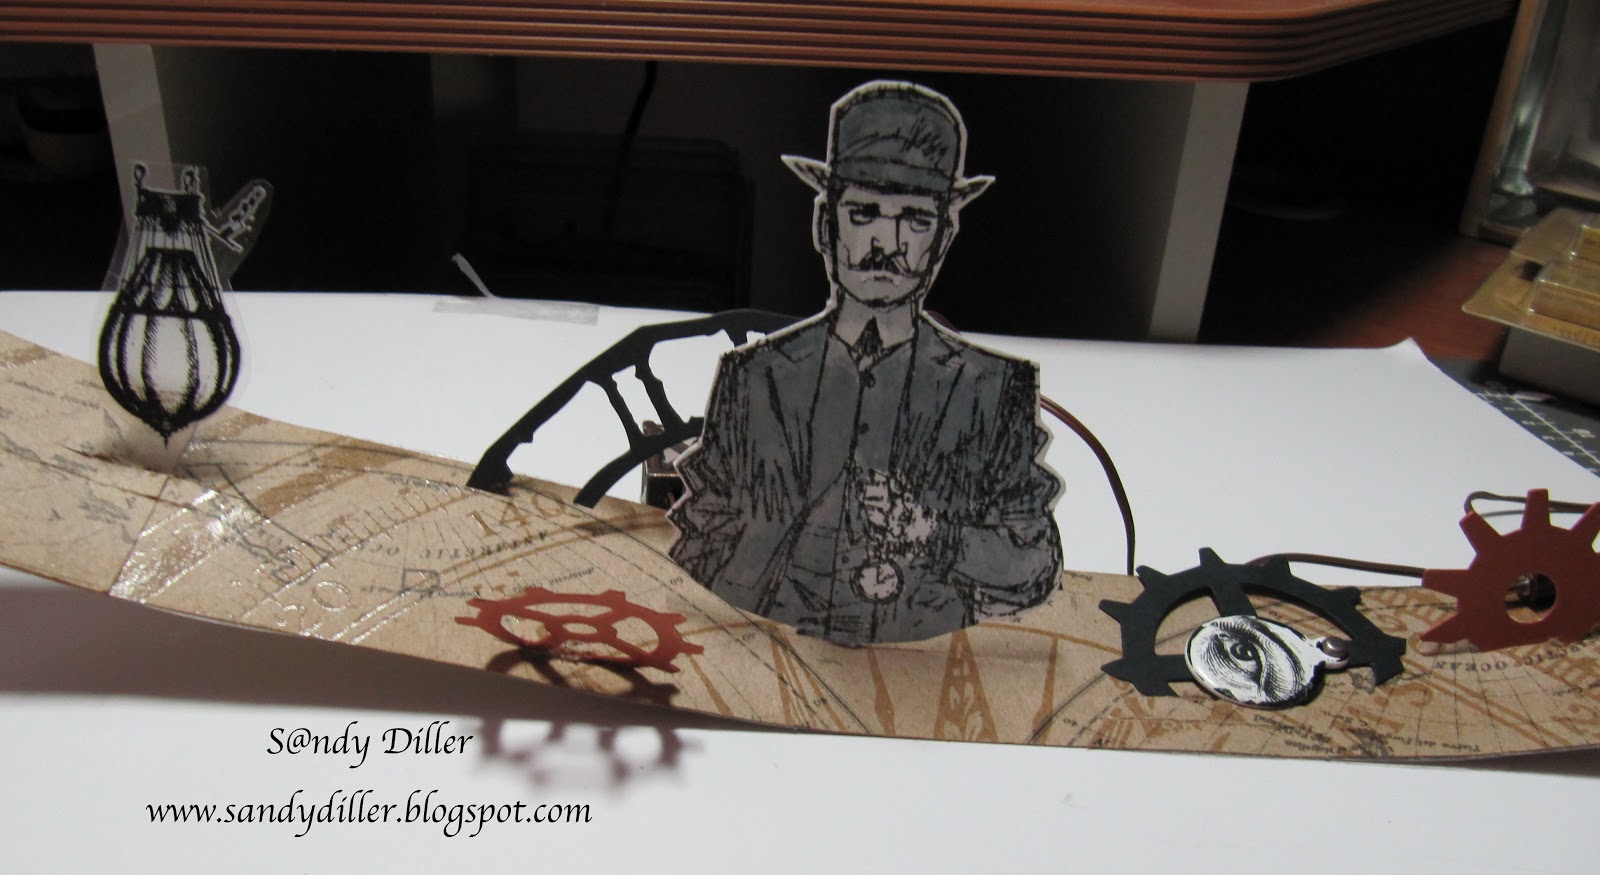
You can see that it is necessary to round off all the edges so when it is placed in the circle it stays round. Also note that the balloon is upside down when the piece is flat. Too funny huh? I used a small piece of Scotch Tape to hold the pieces in place and then placed the entire thing in the clock. No need to glue the ends because the tension of the paper and embellishments will hold it together and when the back is in place it does not move. Hope you enjoyed this project - got to run now and post it on Tim's blog.
Sandy this is stunning! You did a fabulous job on your altered clock!
ReplyDeleteThanks for sharing!
Love it! Lots of great details!!
ReplyDeleteAmazing job!!! Love it1
ReplyDeleteWow! I love this! I'm really speechless! Thanks so much for sharing!
ReplyDeleteOMG that's so clever - love it! And so much work went into it too - awesome :)
ReplyDeleteIncredible. Thanks for sharing.
ReplyDeleteYour altered clock is wonderful!
ReplyDeleteA fabulous clock. Congrats on being a Blogworthy Link.
ReplyDeletehugs {brenda} x0x
Thanks for sharing, this is a stunning project!
ReplyDeleteWhat an amazing clock. Thanks for sharing. Karen.x
ReplyDeleteThis is so kewl! I've been wanting to use one of these clocks for some time.Thanks for sharing your ideas.
ReplyDeleteThis is stunning!!!
ReplyDeleteThanks for the inspiration!
Hugs, Marit.
Wow! And I love the dimension you created!
ReplyDeleteNoreen
Crafty Journal
WOOOOOOOOOOO !!! My goodness what an amazing piece... I love details... and you have got some AMAZING details going on; so much inspiration ( I'm giddy)... techniques galore ( did I mention I was giddy ??...) I LOVE THIS !!!
ReplyDeleteWow, wow, wow! Awesome! Thank you for the inspiration!
ReplyDeleteLovely I have a pocket watch and hope to get assemblage clock and haven't a clue to put in them. You can't go wrong with Steampunk the style is becoming popular as ever.
ReplyDeleteLooking at your work has given me some idea, I'm still not sure and probably make it up as I go along.