Saturday, October 26, 2013

Hi All,

For those of you who somehow got an old post from March, I apologize.  My fingers must of done something that I wasn't aware of.

Anyway - yesterday was my turn to host a lovely group of ladies.  We call ourselves the WOW Group (Wild Old Women).   We get together once a month to create something (hostesses choice), have lunch and drink some wine.  All and all - a good time is had by all.

Here is what we made yesterday - just wanted to share.  Each one of us made the same thing with different papers and embellishments.  Here's mine.

 We all started out with a kit that looked like this, picked out some paper and got started.  I got these kits at a store in Oregon this summer called Craft Warehouse.
I wish I had picked up more kits because everyone seemed to like them and of course wanted more. 
 
Before too long - mine looked like this!
 
And eventually, like this!
 
 
That's it for today, I will be back soon with my Glittery Haunted House.
 
HAPPY CRAFTING!!!


Thursday, September 26, 2013

Mixed Media Mini Canvas

Hi Bloggers,

Today I am taking a leap of faith by posting my latest project which is as the title says a mixed media mini canvas.  I have been wanting to try this for some time but was just a little nervous about getting started and pretty happy with the results. 

Who doesn't love Finnabair? Her work is so amazing.  When you think mixed media, her name is first on the list.  I have watched many tutorials on You Tube but the one I found most helpful was Arlene Cuevas because she showed all the steps from start to finish.  You can watch her video here. http://www.youtube.com/watch?v=iDjRg49OBwc  I simply began pulling stuff from my stash and started adding it to the canvas. Sometimes it's good to be a "saver of things" that you aren't sure what to do with but will use eventually.

I wanted to make the canvas with a  masculine theme so no pink or flowers on this one.
I used a recent photo of Mac and went from there. 


I did as Arlene instructed and used LOTS or texture both on top and on the sides.
 
 
Here is a side view.  You can see how many layers there are.

Sunday, September 22, 2013

Steampunk Spells

Today I've been working on a project for a workshop at our local scrapbook club.  I am demonstrating the construction of the Karen Burniston Accordion Album.  I have a pad of the 8 X 8 Graphic 45 Steampunk Spells Paper and combined the two into this fun Halloween decoration.  I didn't take any pictures along the way so all I have for you today is the finished product.  Hope you enjoy it.


Wednesday, September 18, 2013

Creepy Time of Year

While I was traveling this summer I had an idea for this project but of course I didn't have the right items with me so I had to wait.  However, I did get lucky and found this great paper from DCWV "Spooky Time Stack" on sale during my travels.  It turned out to be a good thing since this month the challenge over at Inspiration Emporium is Falling For Faux .  I made a "Creepy Time" Easel Card with a faux pocket watch. 


I started out cutting the paper the same as you would any Easel Card.  I made this one 4.5" X 6" so I would have more working space on the front.  When the paper is cut, simply score the front cover in half.

I used the Tim Holtz Pocket Watch Die for the front.  I cut a hole in the front of the card lining it up with the center score line, using the same circle that fits in the center of the Pocket Watch.

 I marked the center of the die with masking tape.
 
Line the fold on the center of the die to make a complete circle. Then run through your machine.  I tape mine on so it doesn't move during the cut process.

 
 The hole is lined up exactly where you want it.
 
 
On my electronic cutter(Xyron Wishblade) I cut 12 circles, four of each size, to make the raised portion of the watch.  I just used regular white cardstock of this.

I glued them all together to make layers.
 
 
I gave them a base coat of Tim's Distress Paint

I then covered the entire watch with liquid embossing ink and silver embossing powder.  I added and melted the embossing powder in sections.  I intentionally over heated some of it to give it texture.  Then  a small amount of black embossing powder was added to give it that tarnished look.
  
I found this creepy little guy at Michael's and glued him to the center of the watch.
 
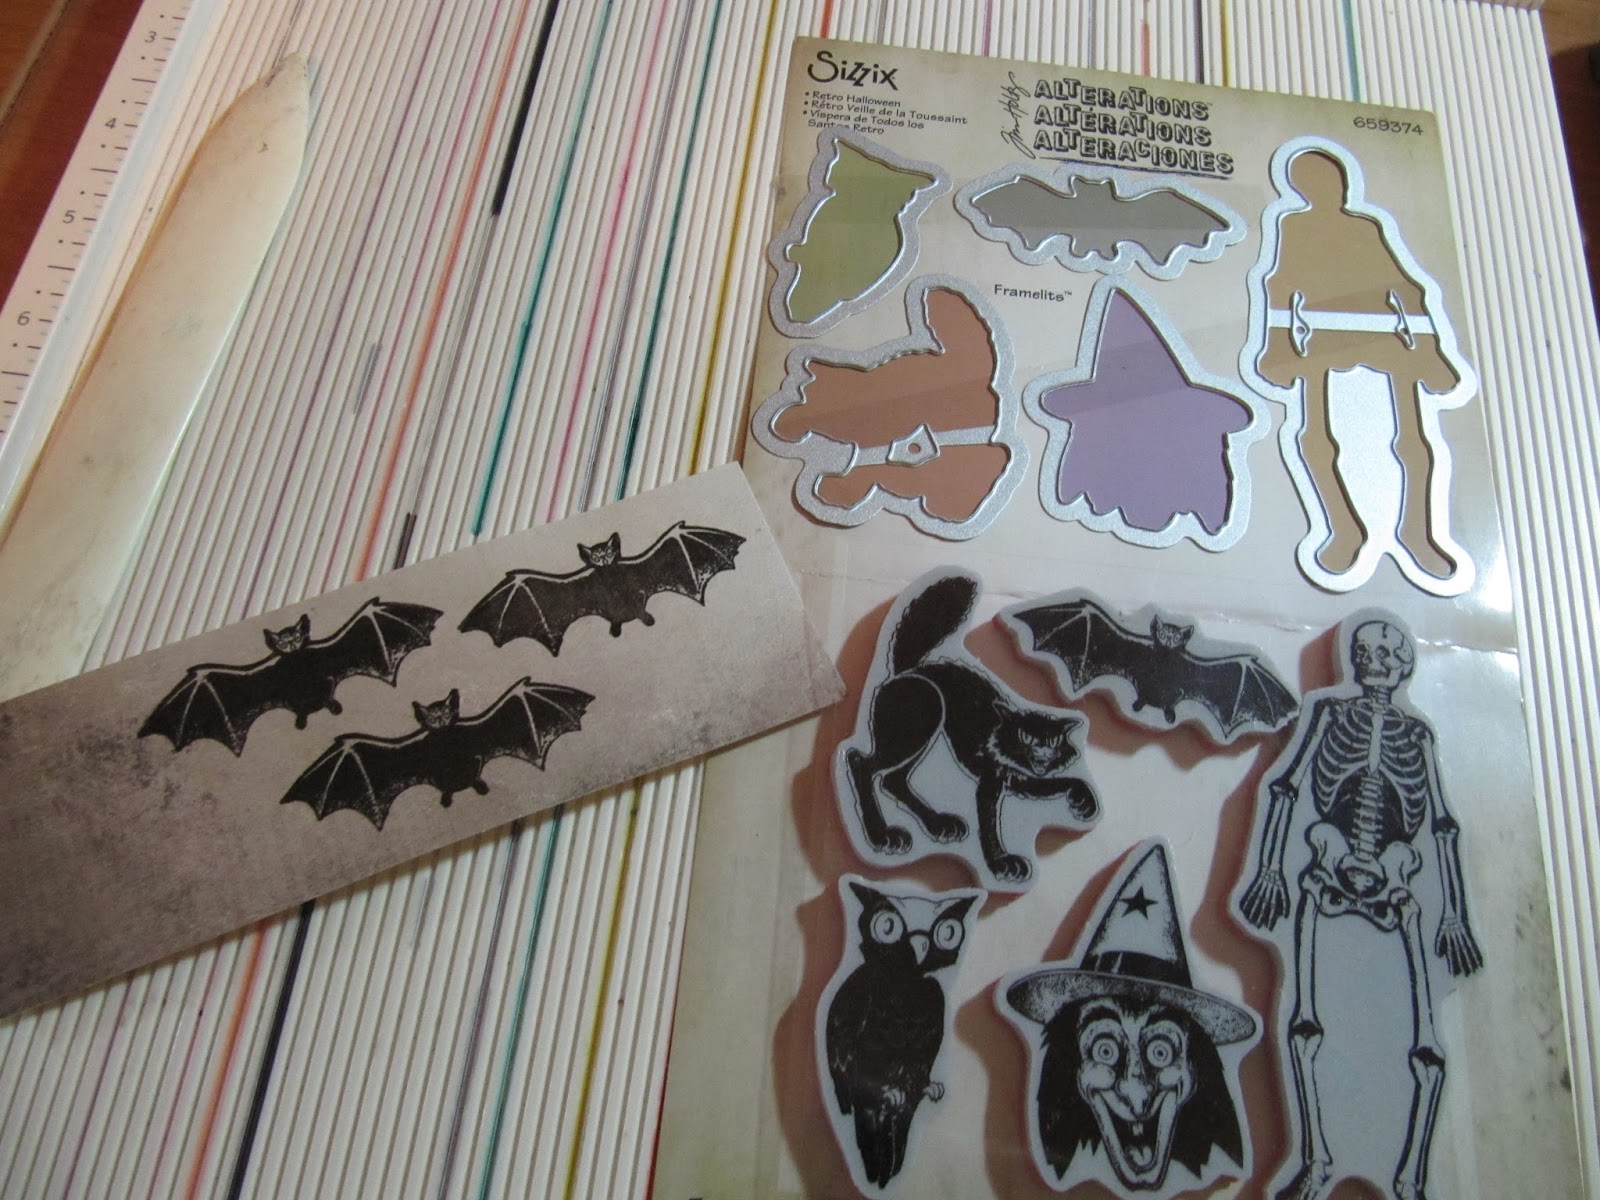
Next I got to use my new Retro Halloween Stamp and Die Set that came in my order earlier this week.  Such fun, I stamped and embossed the bats and then die cut them. Adding a couple pop dots to the back of one bat to hold the card in place while open.

There you have it - it was fun - ENJOY!

Sunday, September 15, 2013

September Tim Tag

Hi Everyone

This month Tim Holtz did his tag with lots and lots of layers using his new stencils.   My stencils arrived earlier this week and I couldn't wait to use them.  I decided to do a 5 X 7 canvas instead of a tag and I am pretty happy with it, especially for my first try.


This was lots of fun since I decided to do as Tim says and "embrace imperfection".  I used many of  my Ranger supplies including distress paint, stains and inks.  The newest product that I tried out is Wendy Vecchi's Translucent Embossing Paste and I have to says I LOVE IT!!!  I used it with the Rays Stencil between 2 layers of color.  It dries clear revealing the color and stenciling below and then acts as a resist for any other colors added.  I know I will be using this product a lot.  For the words on the rays and the eye I used Remnant Rubs.
 
 
This is a little out of the box for me (I know, there's a box??) but it was fun - I hope you enjoy and would love some comments.


Wednesday, September 11, 2013

SSS Embossed Challenge

Hi Everyone,

We have been off on our Road Trip for awhile and had a wonderful trip with no problems but THERE'S NO PLACE LIKE HOME.

I have already succeed in making a giant mess in my studio and I am so happy!

This week the challenge over at Simon Says Stamp is "embossing". When I saw that
melted embossing powder was included I just had to play along.  I made a necklace using Ranger's Clear UTEE along with some colored embossing powders, the Melting Pot, Krafty Lady Molds and a few beads.

HERE SHE IS -

 
If you haven't tried this yet, wait no more, it is great fun.  You can't waste anything because if you don't like it you can throw it back in and melt it again.


 These are the Krafty Lady Molds I used.  It is a simple process to melt pour and decorate.  Give it a try - I think you'll like it.

Monday, August 19, 2013

"Just Add Photos"

Hi everyone,

It has been awhile since I've added a post but with summer upon us, as usual, it is time for a few road trips. We recently visited Lassen National Park in California and I decided to use my Road Trip Configuration Book for my photos.  In my previous post "Let's Take A Road Trip" I showed lots of photos of the book - you can see the entire post by clicking here.  All I had left to do was "Just Add Photos".


For the August Tim Tag, Tim did lots of stamping and he used the Road Trip Stamp Set.  Tim used lots of masking but I did another fun technique which is to use clear embossing powder on black ink.  This is something I really like to do because it makes the stamped image stand out and it also acts as a resist for any inking done later.  We all know how we like to ink the edges of our projects.  In this project I used lots of stamped images from the Road Trip Stamp Set as well.

Over at the Inspiration Emporium the monthly challenge is "My Summer Vacation" so I think I will be entering this one there.


I'll be back later with another addition on the back side of the album - have fun and happy travels!