
I'm thrilled to have been chosen as the winner of the Time After Time Challenge over at Frilly and Funkie. As winner I get to be today's guest designer. I hope you will stop by the Frilly and Funkie blog to see my project as well as those of the other talented design team members. Don't forget to enter the challenge, you may win a prize or the opportunity to be a guest designer.
The theme for this challenge is, "On The Runway", anything depicting sewing or fashion. This is one of my favorite topics because it brings back fond memories of sewing lessons with my grandmother.
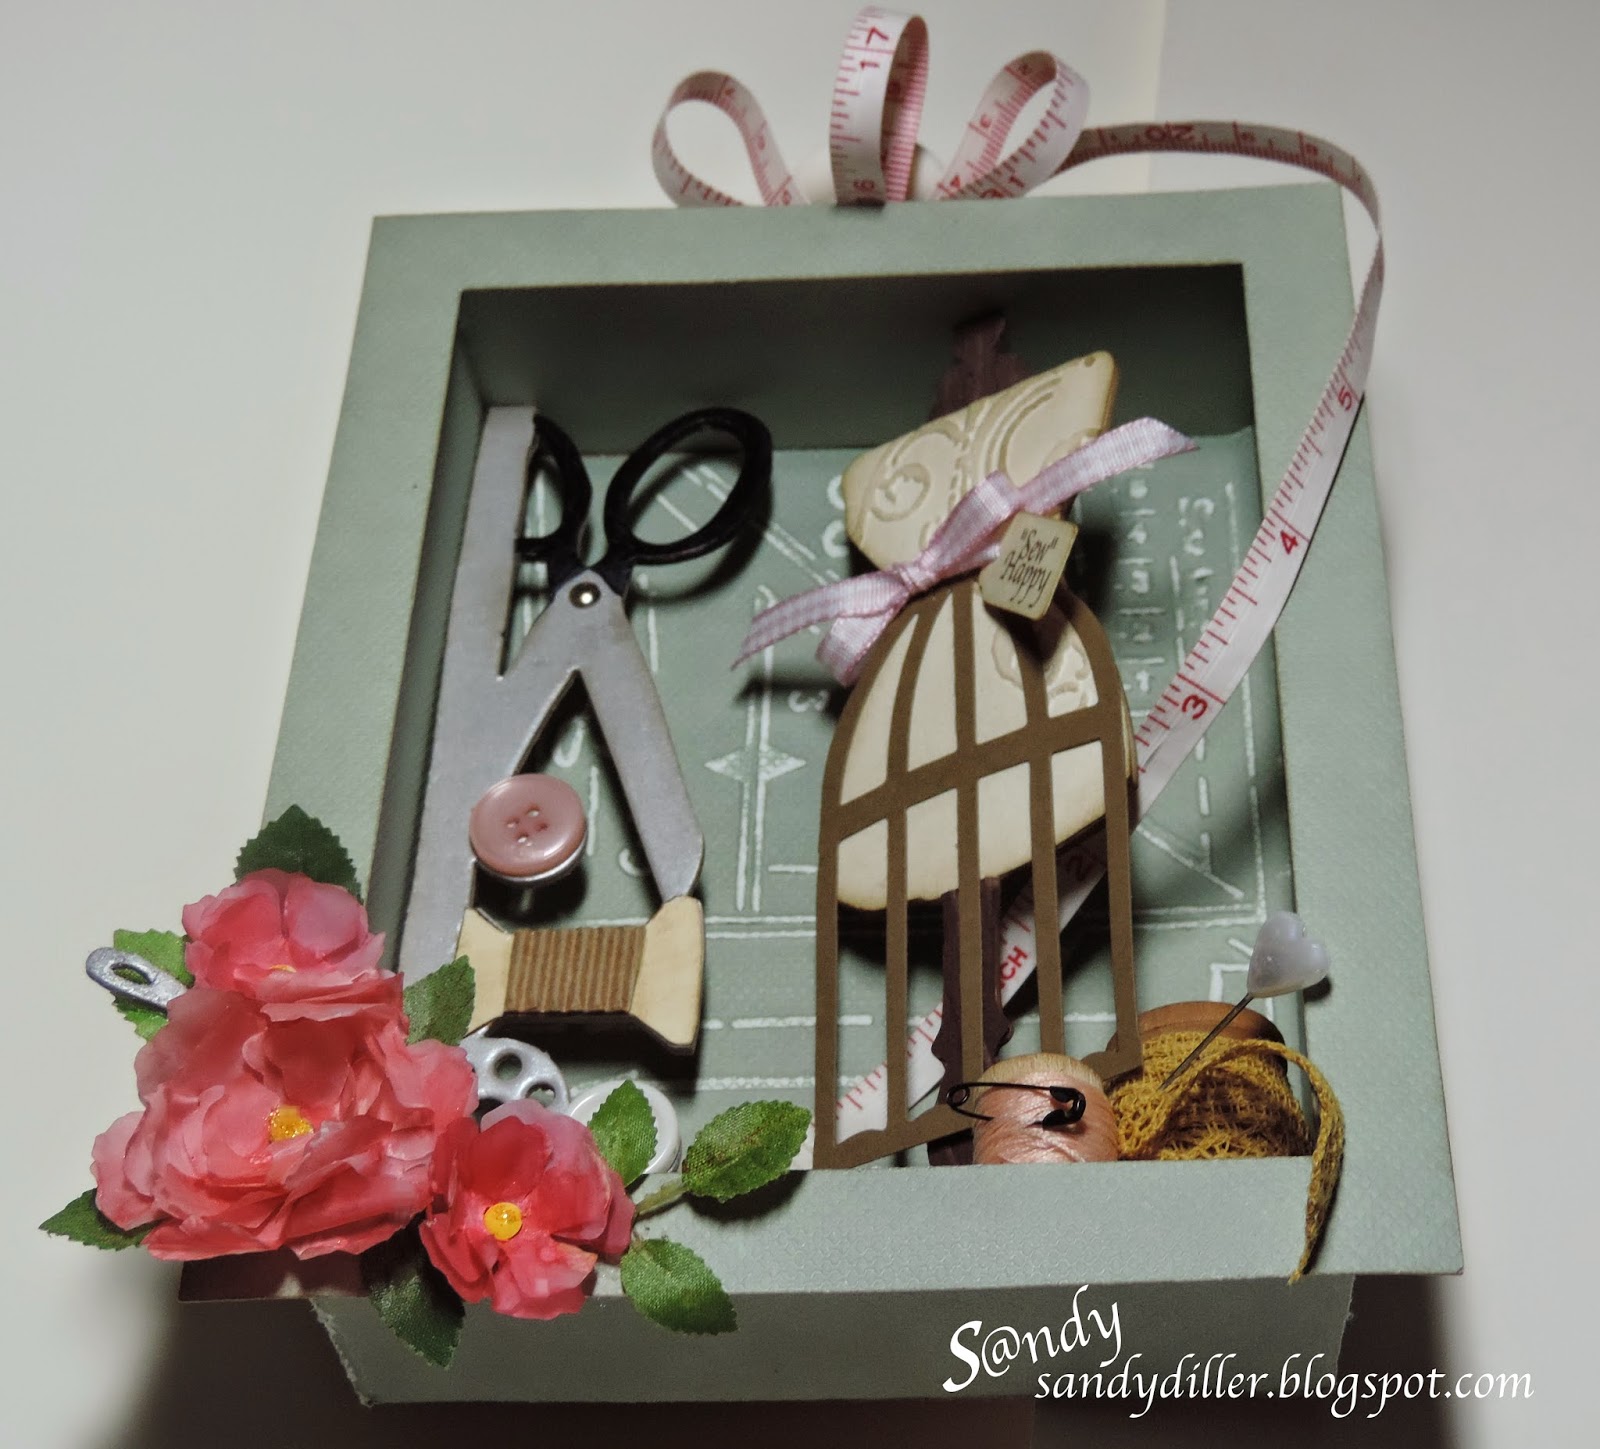
I made this "Sew Happy" shadow box depicting what happens "before the runway" -


Here's How I Did It!!
I knew I wanted the box to be 4.5" X 6" so rather than look all over for a box that size, I made my own out of chipboard and then covered it with paper from We R. The color is called Harvest Sage and it has a white core that is good for embossing and sanding so that is just what I did.

After I finished sanding, I placed the panel inside the box. For the panel on the outside, I simply cut an opening in a rectangle that was 1/4" smaller than the box on the inside with a 1/2" border all the way around.

When using a steel rule die I like to cover my chipboard with paper and then cut everything at one time. I like to use double back tape because is neat, clean and smooth on the finished project. Here I used a piece of silver metallic. After cutting, it is ready to decorate.


Next I cut the dress form using the Sewing Room Die but this time I cut the form and cover pieces separately because I wanted 2 different colors and I also wanted to emboss. For the skirt portion I used the Caged Bird Die and cut it down to the size that fit the dress form. I made a small tag that says "Sew" Happy, put it on a pink ribbon and added it to the dress form.

Next I started working on the accessories and embellishments. I wrapped some lace and some thread around plain wooden spoons, added a couple of pins.

I love little details so had to add a few more. I made some flowers using my favorite method which is to cut several layers of vellum, dye them with ink and water in a Mini Mister and then dry them with a heat gun. The edges curl up from the heat and then I add a brad to the center and topped it off with some Stickles. When I started gluing the flowers on I decided to add a little chipboard needle that I found, I colored it with a silver pen and stuck it in.

I always think my tutorials are going to be short but it never seems to work out that way. We're almost there - next I found a tape measure in my stash and used it to make the topper. I always edge with Distress Ink and this time I used Frayed Burlap on everything. I added a Tim Holtz knob in the center and it was done!


Well, there you have it. Hope you have enjoyed my project and will try one of your
own.
Sew happy,
Fabulous sewing piece Sanda, love this and a great step by step too. And of course big congrats on be a guest designer over at F&F!! How wonderful to learn sewing from your grandma!
ReplyDeleteIt is a wonderful project Sandy and there are so many wonderful details to take in, right down to the brad on the scissors to make it look like a hinge! I love how you used the tape measure as a feature too. Congratulations from me too on being a GD at Frilly and Funkie. Anne xx
ReplyDeleteThis is fabulous for the theme and has so many wonderful sewing themed goodies to look at. I love the seam binding loops at the top and it is so clever of you to use the bird cage for the dress form skirt, which is exactly what vintage dress forms looked like. Congratulations on being our Guest Designer at Frilly and Funkie.
ReplyDeleteHugs!
Cec
This is such a wonderful project Sandy and so many details! I love the tape measure on the top and your vellum flowers are gorgeous. Congratulations on being Guest Designer at Frilly and Funkie. Jennie x
ReplyDeleteJust love how this project turned out!!! Thanks for sharing!!!
ReplyDeleteThis is a fabulous shadow box Sandy, I love the elements you have included especially the tape measure bow on the top and thanks for showing the creative processes. xx
ReplyDelete