This is also a good one to enter in the Simon Says Challenge this week. The stamp you love...(but don't use) I have to admit the only reason I haven't used these stamps is the fact that they are new.
Here's how I did it!
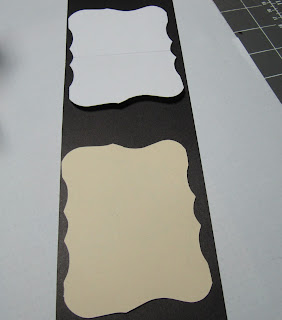
I needed the inside frame to be 4 1/4" high - so following Karen's directions I marked my die at 2 1/8" and placed the fold of the cardstock on the taped line. I cut the Accordion Die Frame from Stampin Up, Perfect Plum. I wanted 4 sections so of course cut it 4 times.
For the next step I stamped my images with black Versa Fine Ink and then used clear embossing powder and then heat set. I colored selected sections of each stamp with Prismacolor Pencils and inked the edges of each panel with Perfect Plum ink.
In order to hide the fold line in the outer frame I decided to emboss the center sections.
I had an old AccuCut Pad that I cut with the Tim Holtz Scissors and placed it on top of the folder. I taped the pad down to the folder so it wouldn't move when going through the machine. After it is run through the machine it is embossed only where the pad was placed.

After joining all the sections and adding the stamped images it's time to join the panels with the tabs and embellish, my favorite part.
A few flowers from the Tattered Flower Garland Die, edged with Perfect Plum, and a couple things from my stash - it's good to go.
SPRING HAS SPRUNG - ENJOY !!


Love this project. Perfect for spring. Very cute and versatile album and shows off Tim's blueprint stamps wonderfully.
ReplyDeleteThank you for sharing.
What a great piece, as previously said, perfect for spring, your pastel colour scheme really shows it off to it's best too. Thanks for joining us for this week's Simon Says Stamp and Show Challenge!
ReplyDeleteExcellent
ReplyDeleteWonderful!! =)
ReplyDeleteGorgeous and very creative. You did an amzing job on this !!! Thanks a lot for sharing !!
ReplyDeleteHugs from Spain
Awesome, thanks for explaining how this was done.
ReplyDeleteBeautiful spring/Easter display.
ReplyDeleteEverything about this is wonderful, Sandy! I love the technique of embossing some areas of the album with a partial plate. Brilliant!
ReplyDeleteGreat Easter card!
ReplyDeleteI love the hint about embossing. Now I just have to find a junky pad to use.
ReplyDeleteI love this card and thank you for that great embossing tip!
ReplyDeleteVery nice project!
ReplyDeleteOMG ... I can't believe it ... I just got that die and have been playing around with it and I was gonna use those stasmps to create spring (WoW... how often does that happen... someone's idea is that close to your own) !!
ReplyDeleteI love what you did !
WoW! Those colors are to "die" for. Tks for sharing ur tut with all of us!
ReplyDeleteSo clever and so SPRINGY! How fun!!
ReplyDeleteTim Holtz said to come and see your project. I have all the dies and stamps you mentioned. (not the AccuCut Pad) I have to try this. A great card! Thanks for sharing
ReplyDeleteGreat project. Joanna
ReplyDeleteVery, Very clever.....may have to do this one...Thanks
ReplyDeleteFabulous, Sandy! Love what you did with those stamps and the Sizzix dies.
ReplyDeleteTim sent me! Your card is fantastic! Wow!
ReplyDeleteWhat a beautiful Easter project, Tim was so right to send us over here! Love it all but especially your tip for embossing the crease.
ReplyDeleteI love your Easter project! Tim sent me here and it was worth it!
ReplyDeleteBeautiful. Congrats on getting a shout out from Tim.
ReplyDeleteBeautiful card, love your embossing tip! Congrats on your shout out from Tim!
ReplyDeleteWonderful card...the embossing is soooo clever - TFS how you did it!
ReplyDeleteI really love this card! So cool!
ReplyDelete